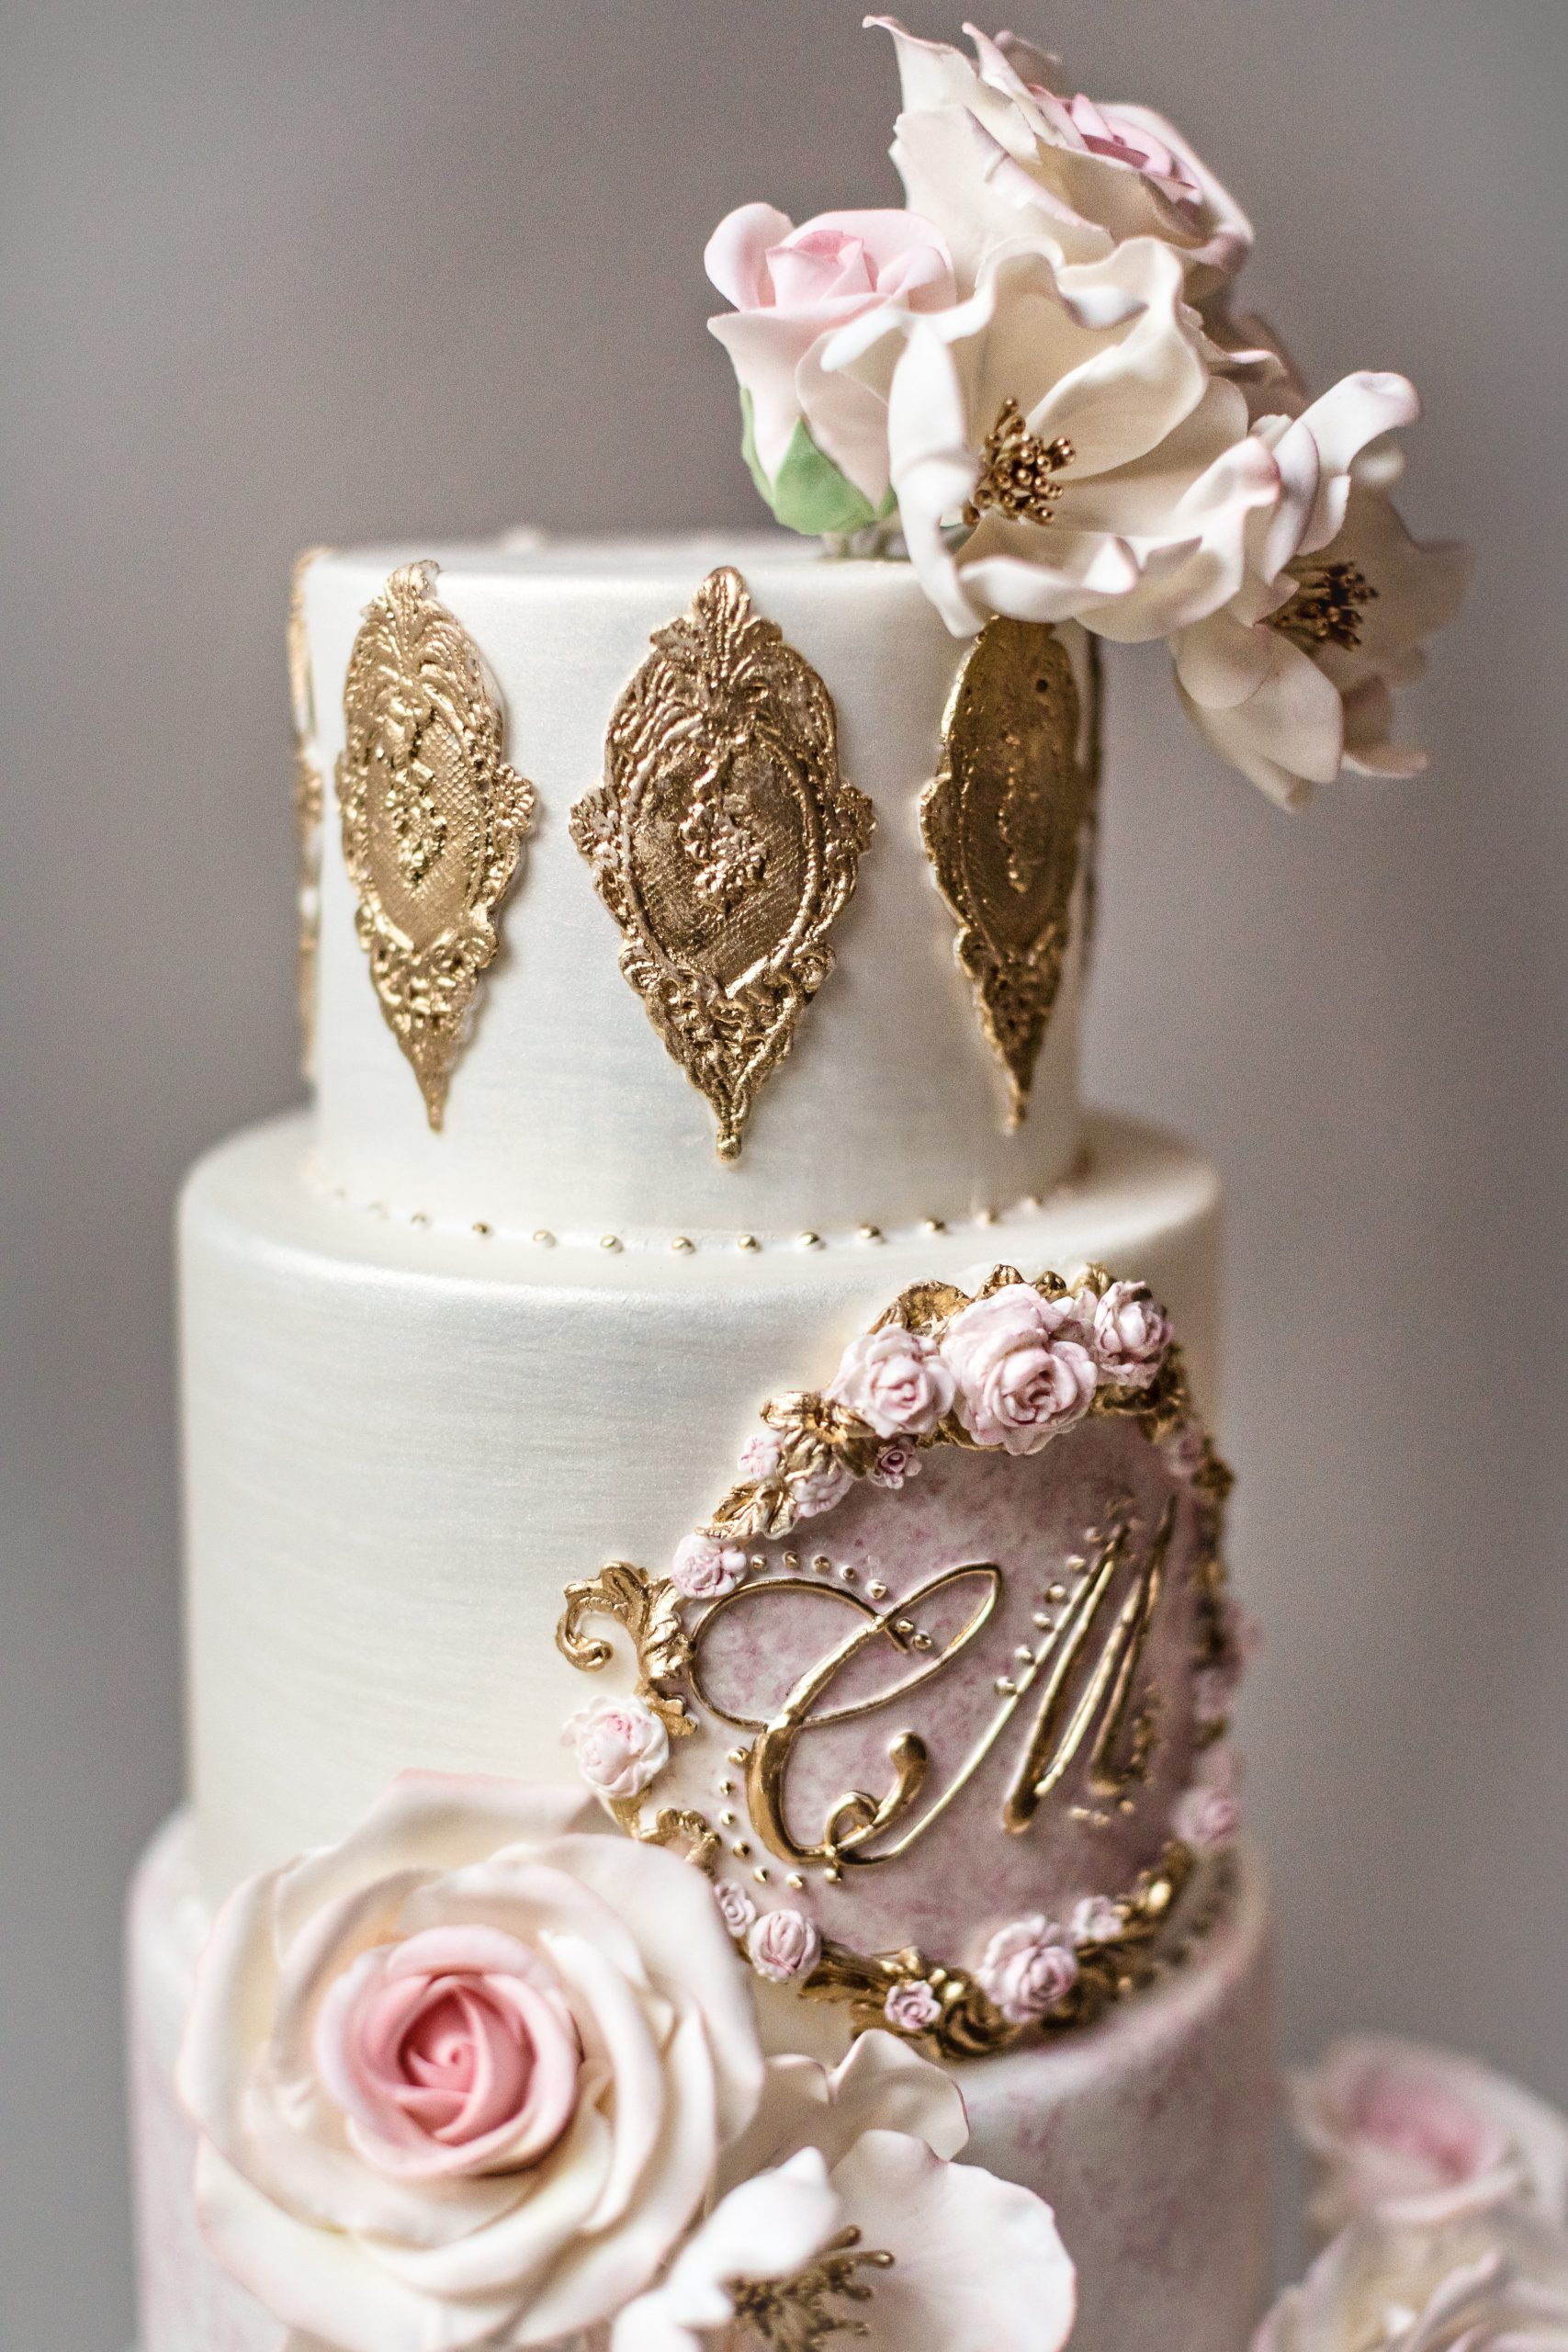
Vintage Gilded Rose Wedding Cake

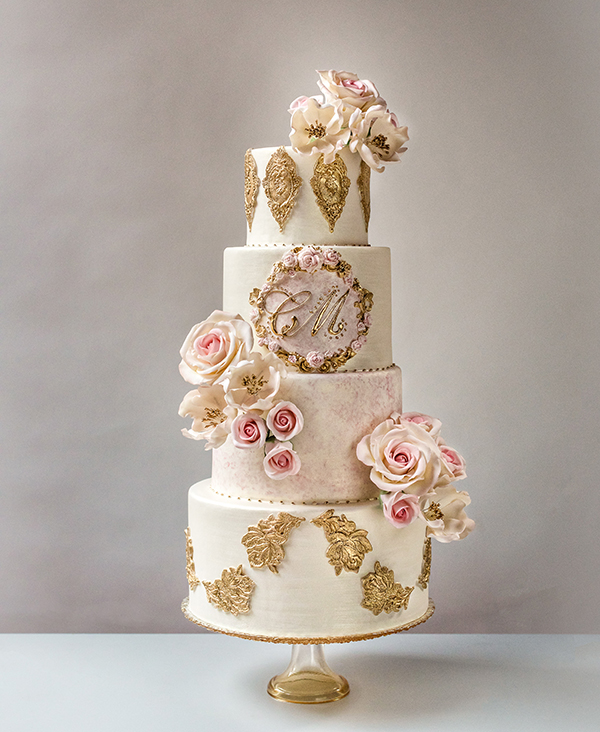
Welcome to our Vintage Gilded Rose Wedding Cake Tutorial!
In this guide, we’ll walk you through the process of creating this beautiful wedding cake adorned with hand-crafted sugar roses, delicate lace, and personalized gumpaste monogram plaque. From preparing the gumpaste flowers to decorating each cake tier with finesse, we’ll provide you with step-by-step instructions and a detailed list of tools and supplies needed.
Join us as we delve into the world of bespoke wedding cakes, where every detail is meticulously crafted. Let’s transform simple ingredients into a charming centerpiece for you special event. Get ready to embark on a journey of creativity with out fun cake tutorial!
Photography by JAG Studios

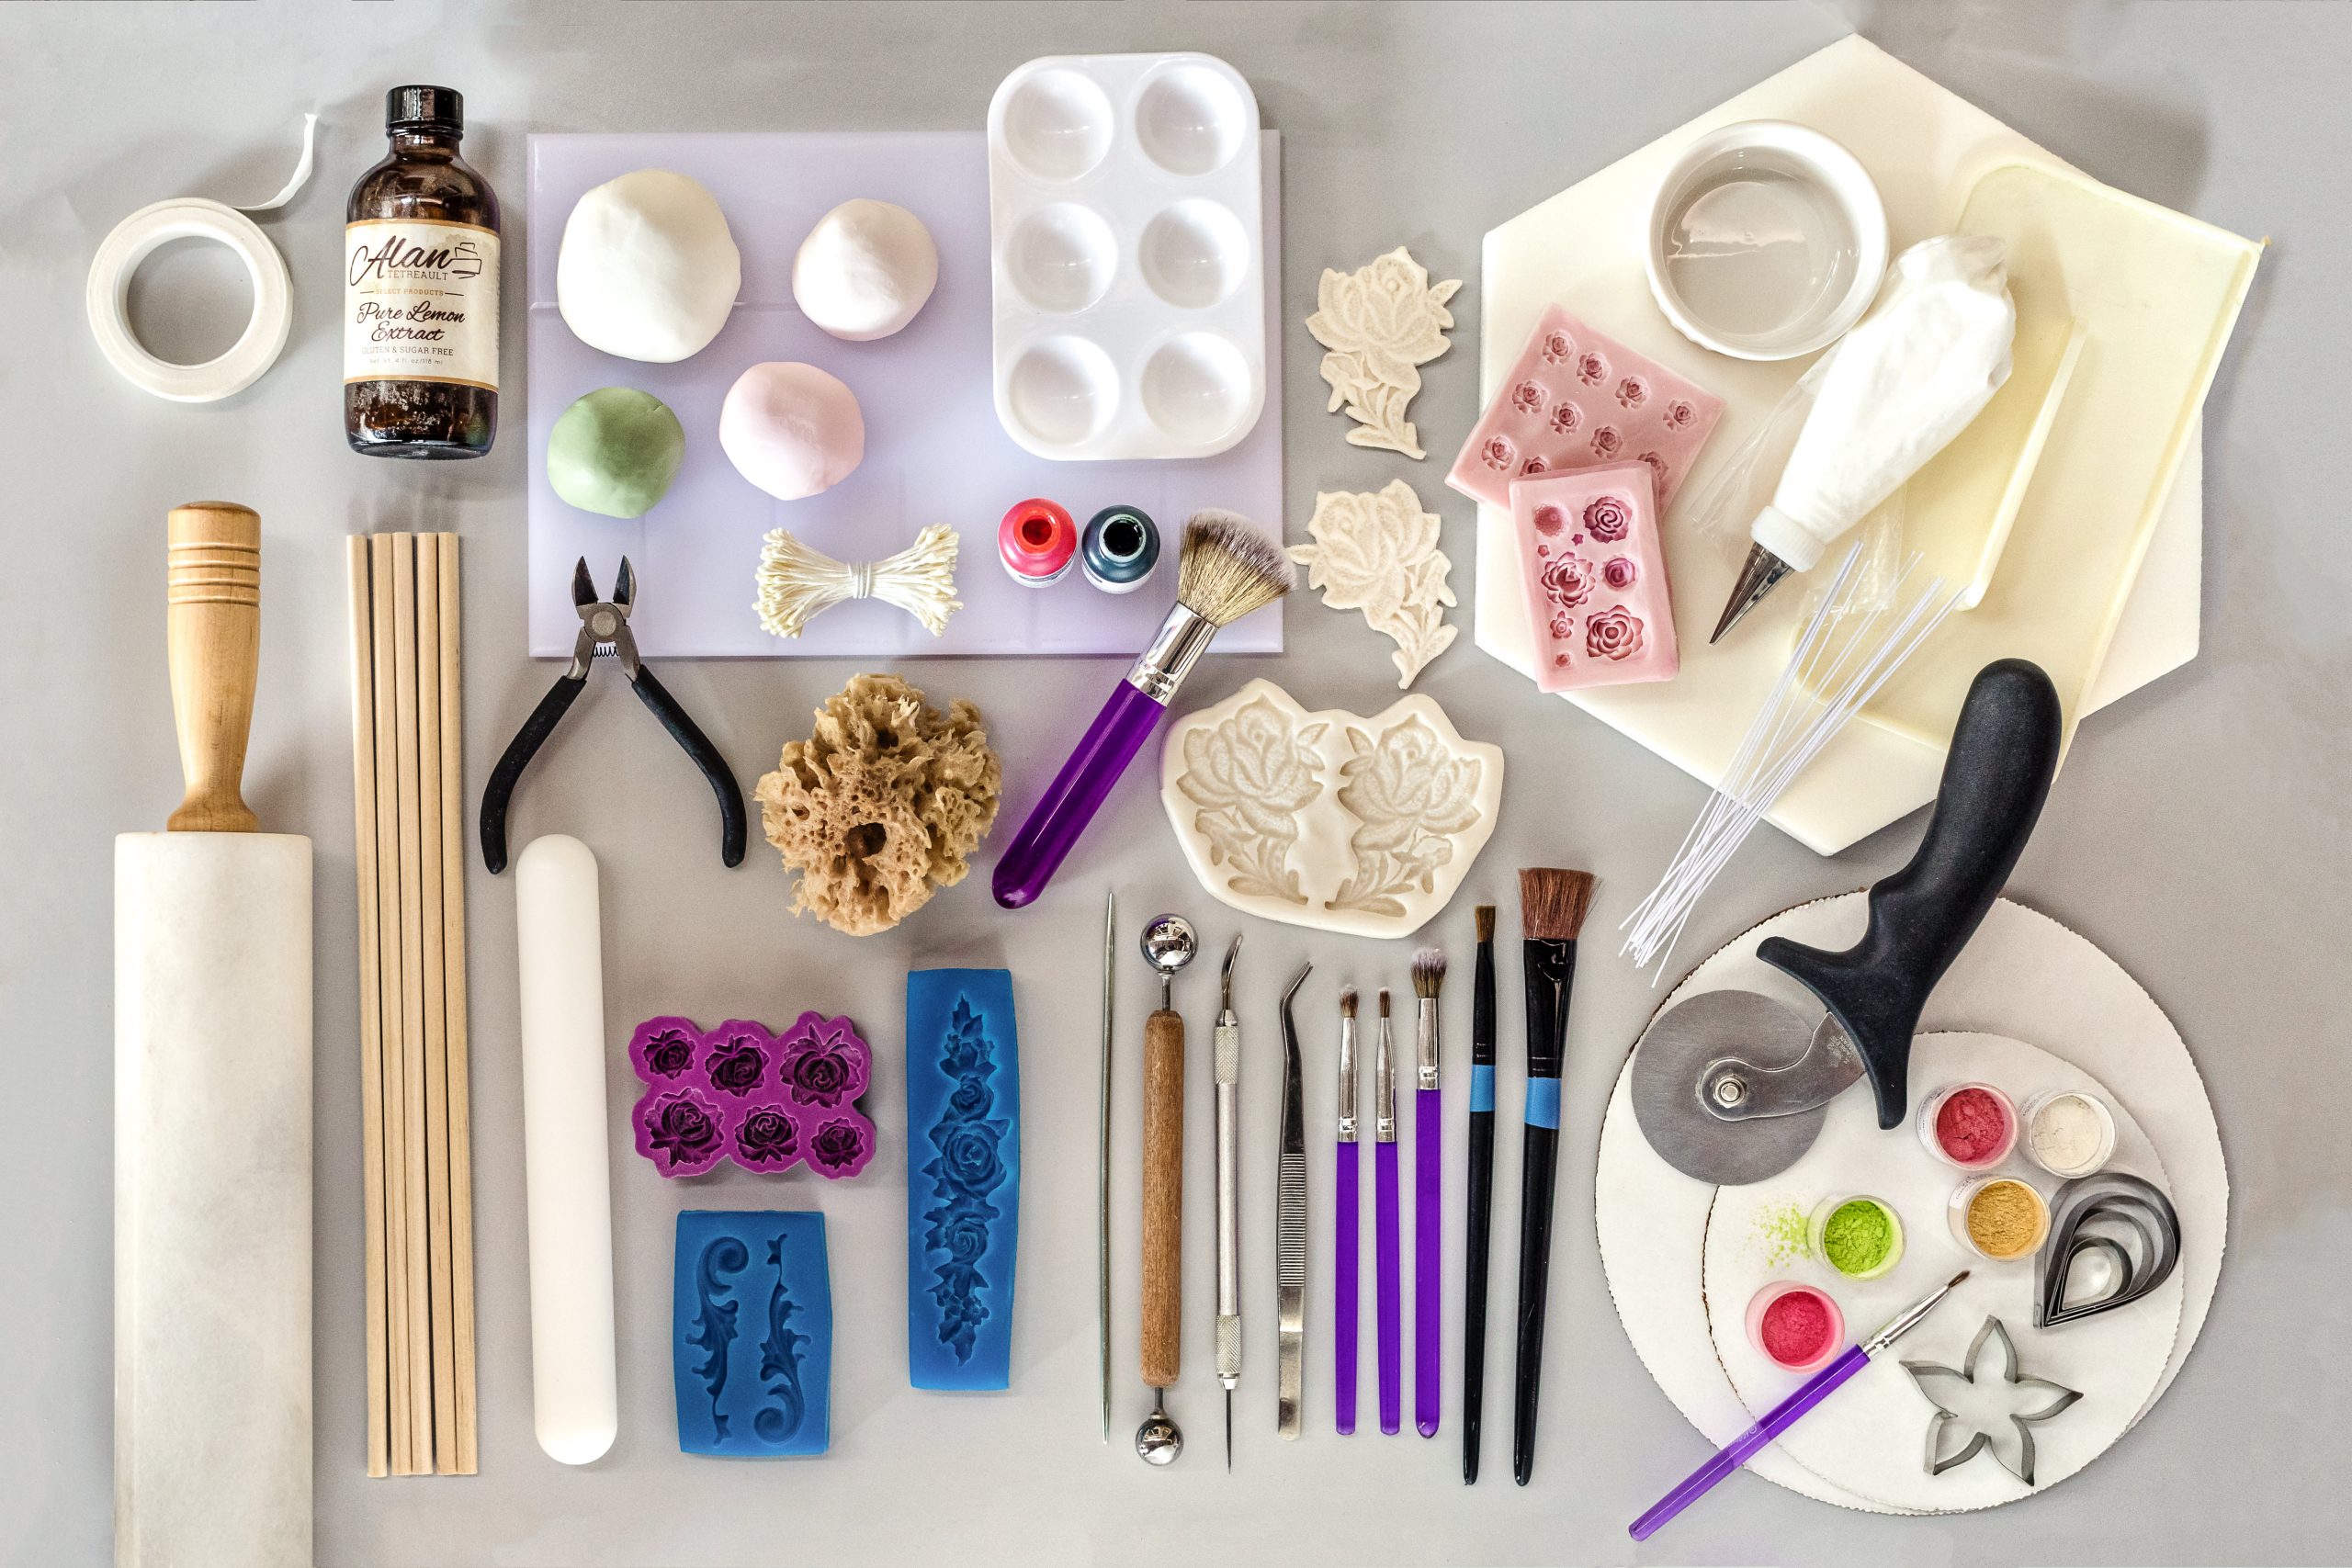
Tools & Supplies
- Edible gold dust
- Edible gold pearl dust
- Edible pink iridescent dust
- Lemon extract or vodka
- Green & pink gel food colors
- Small container of corn starch
- Gumpaste glue or water
- White & ivory flower paste/gumpaste
- 7 lbs of ivory fondant/ sugar paste
- Powdered sugar
- Royal icing (Recipe Below)
- Round 1/4 inch foamcore boards 5 1/2, 7 1/2, 8 1/2, & 10 1/2 inches
- Large rolling pin
- Pizza wheel
- Fondant smoothers
- 1/4 inch wooden dowels
- 22 & 26 gauge cloth-covered floral wire
- White floral tape
- Wire cutter & plier
- Small non-stick rolling pin
- Non-stick petal grooved cake board
- Color mixing palette
- Small container for mixing food paint
INSTRUCTIONS
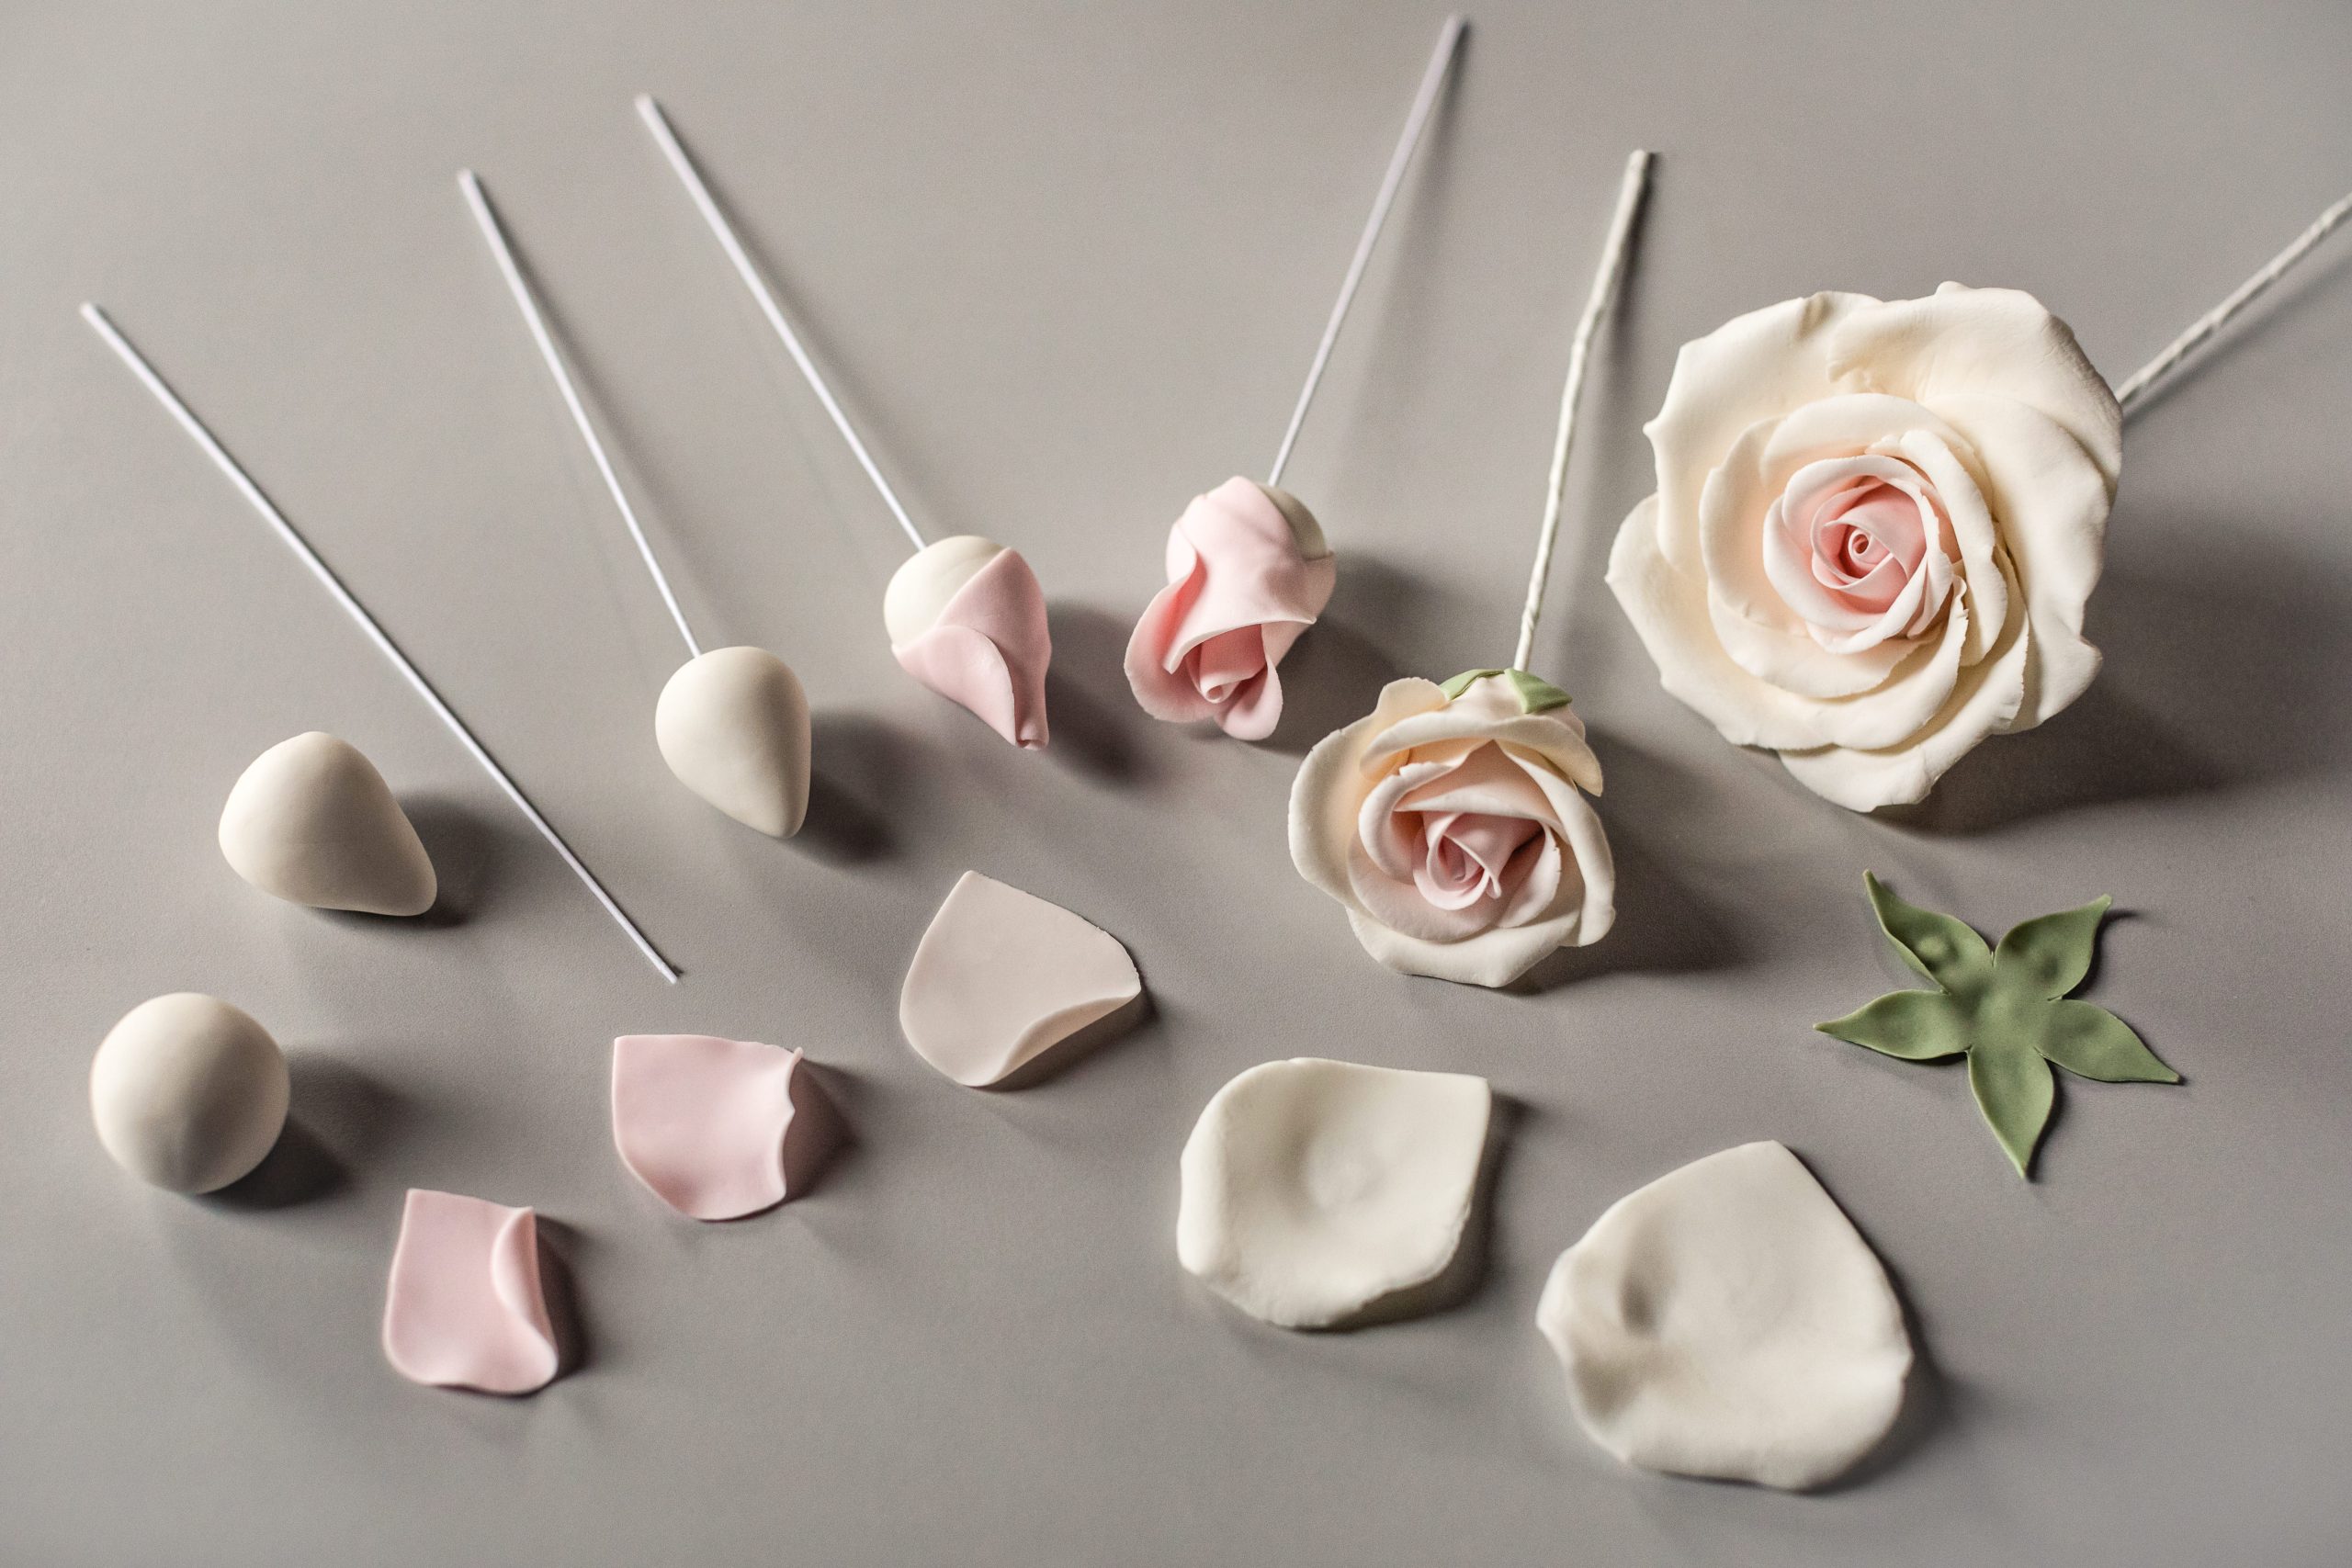
How to Make the Gumpaste Roses
You will need 3 large, 2 medium, and 5 small roses
Start by making a ball of gumpaste and then shape it into a cone. You’ll need 10. Make a small hook using pliers at the end of the 22” gauge wire, dip it in water or gumpaste glue, and insert it into the bottom of the cone. Let dry overnight.
-1st layer: For each cone, cut 2 petals out of pink gumpaste with the smallest rose cutter, thin edges with the ball tool on a foam pad, pressing with the knitting needle while sliding in a diagonal direction to curl the top edge. Apply a small amount of water to the lower half of each petal and glue with the petals overlapping each other. Repeat for all 10 roses and insert wired flowers on a piece of Styrofoam and let dry until firm.
-2nd layer: For each flower, cut 3 petals out of light pink gumpaste with the next size cutter, again thin edges on a foam pad with the ball tool and press with the knitting needle while sliding from the top edge to form a slight bend. Brush the petals with water or gumpaste glue halfway down and glue around the flower cone with the petals overlapping each other. Repeat for all 10 remaining roses, and after gluing petals, insert wired flowers on a piece of Styrofoam and let dry until firm. Put 5 aside; these will be your small roses.
-3rd layer: For each flower, cut 4 petals out of ivory gumpaste with the next size rose cutter, thin edges with the ball tool on a foam board. Thin the center of the petal in a circular motion to form a concave shape, then use the knitting kneedle to press and slide the top edge of the petal in a slight diagonal direction from both the left and right top sides. Let petals firm up for a few minutes before gluing to the rose base. Brush lightly with water to the lower 1/3 of the petal only, taking care not to oversaturate the paste as it will get soggy, and attach petals so that they overlap each other. Insert wired flowers on a piece of Styrofoam and let dry.
Set 2 aside; these will be your medium roses.
-4th layer: For each flower, cut 5 petals out of ivory gumpaste using the largest cutter, thin edges with the ball tool on a foam pad, and using the knitting needle, press and slide to form a bend at the top. Let petals firm up for a few minutes. They should be able to hold their shape while still being pliable. Brush lightly with water and glue petals overlapping each other. Insert the wire on a piece of Styrofoam and let dry completely, or alternatively you can use a flower former or hang upside down on a wire rack. You should have 3 large full size roses.
After all the roses have dried, cut 10 calyxes using the calyx cutter, thin edges with the ball tool on a foam pad, brush lightly with water and insert wire through the center, gluing to the back of each rose (via the water). Let dry overnight.
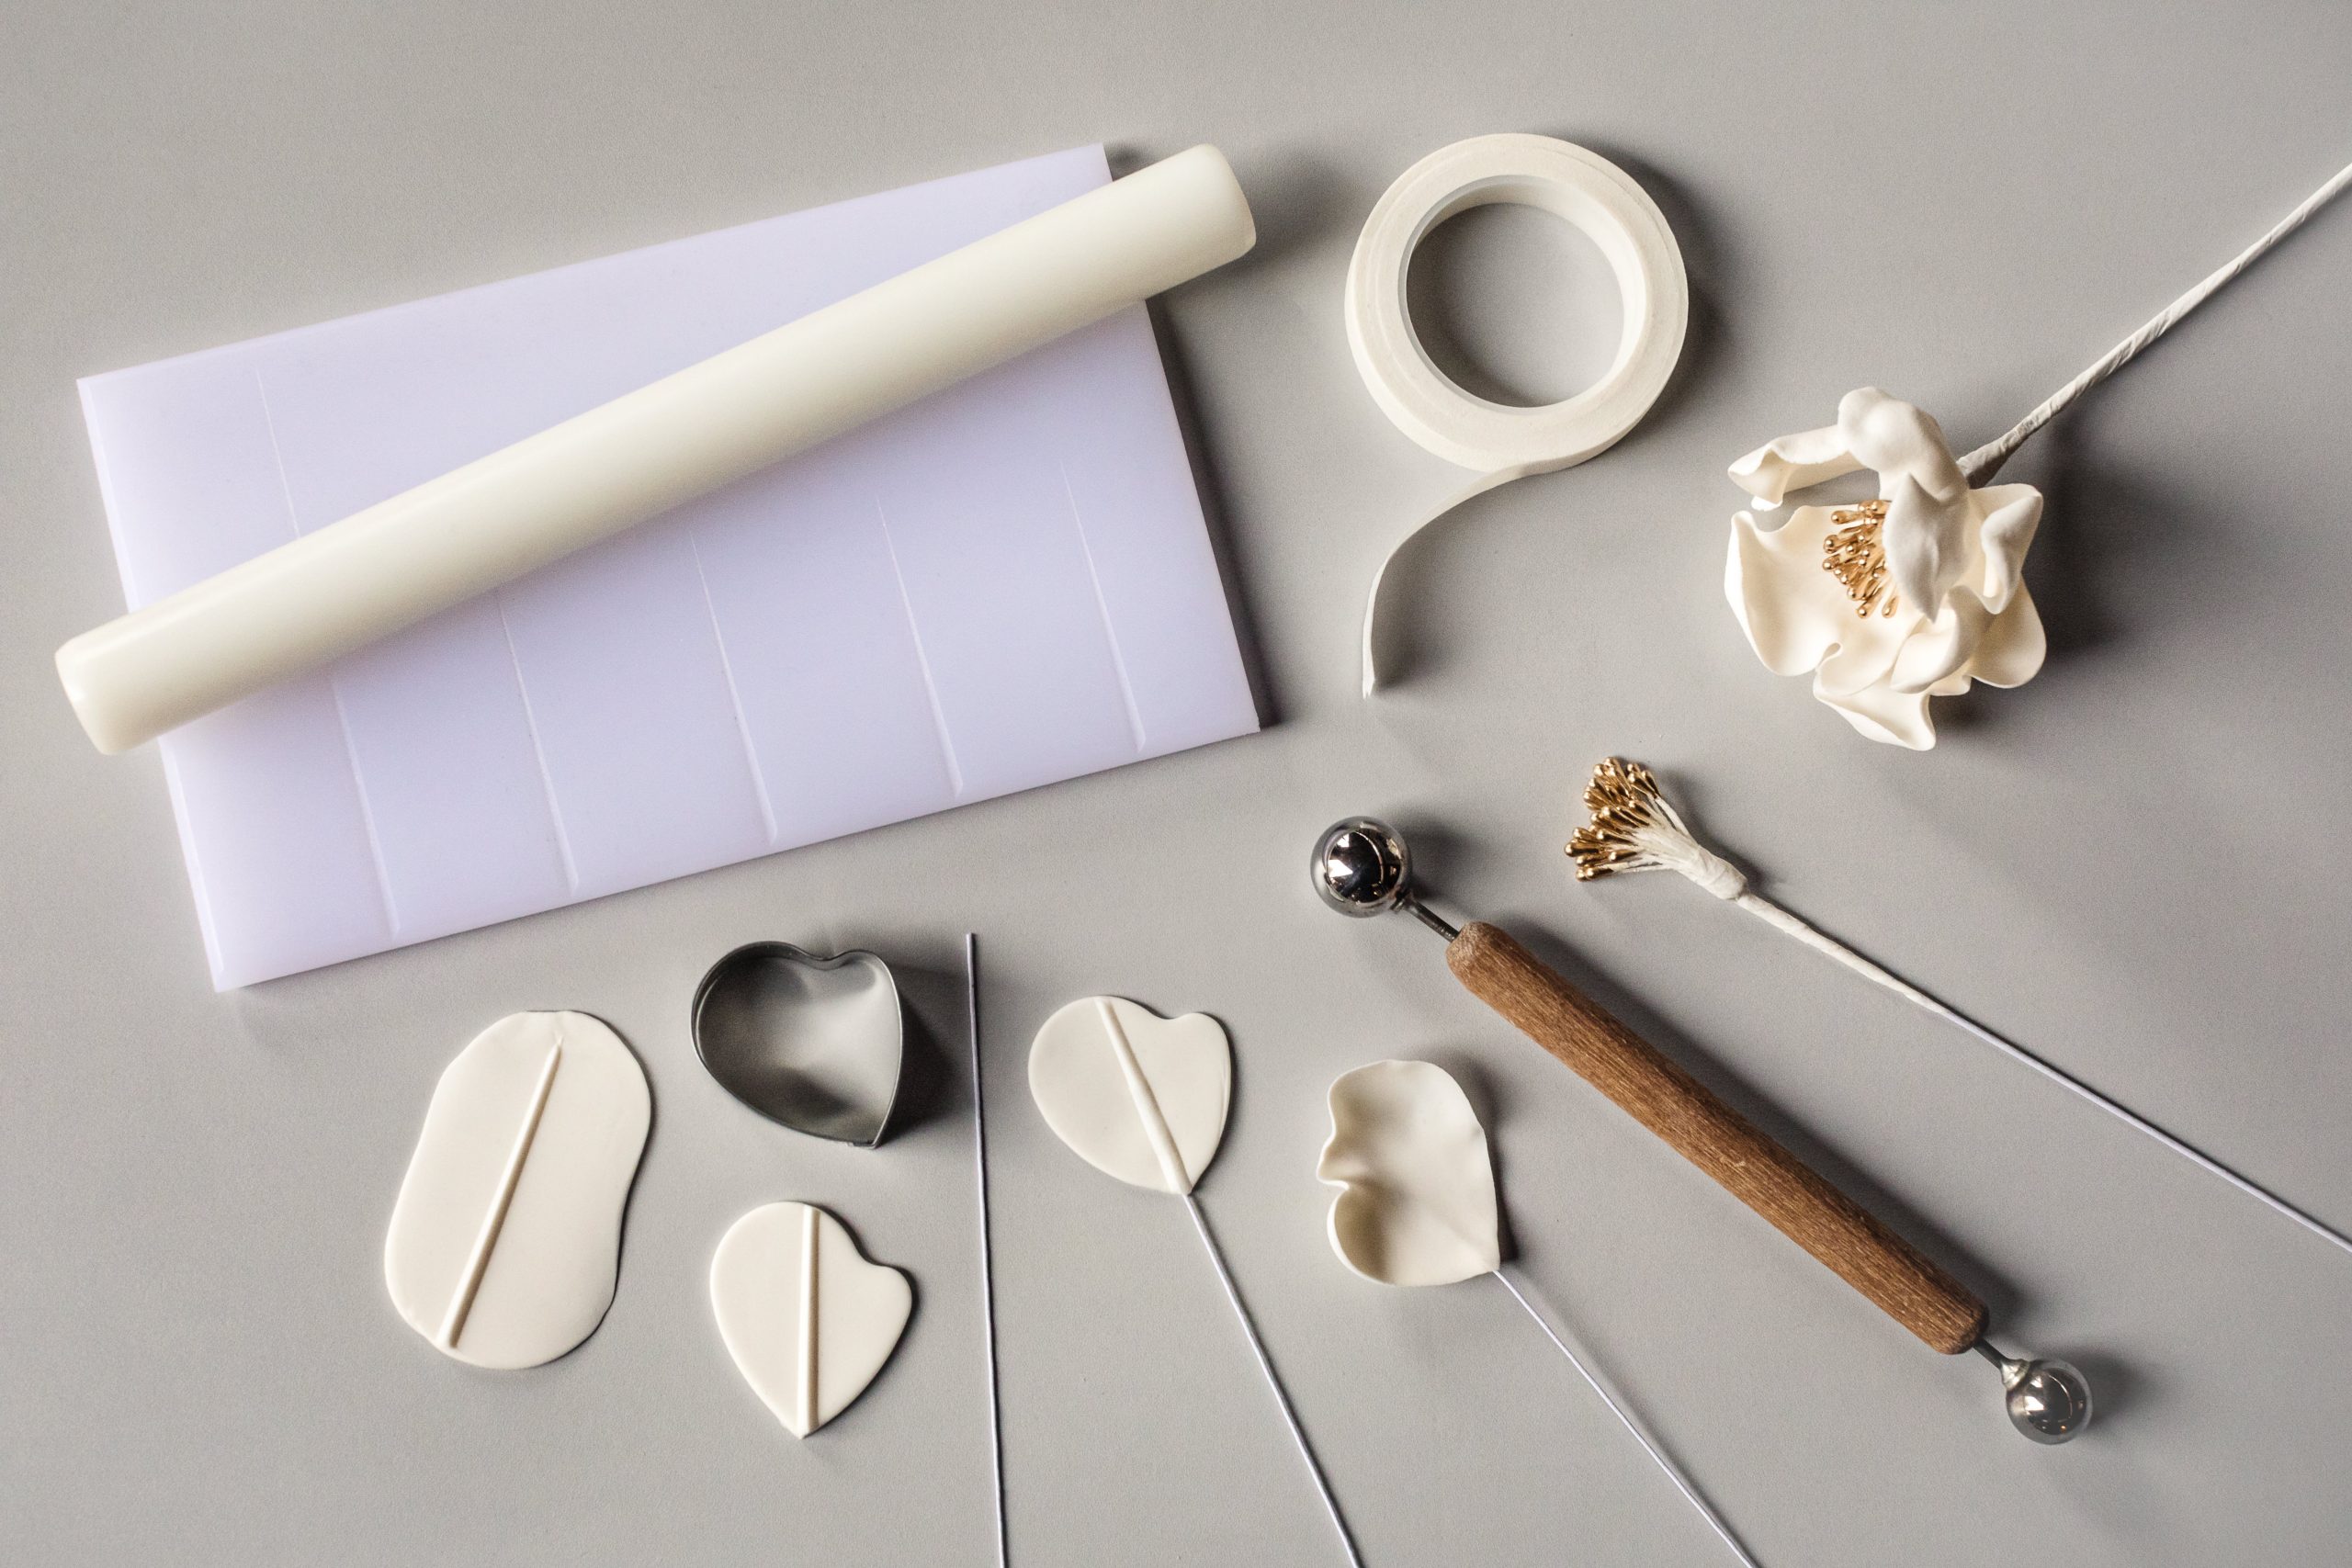
How to Make the Five-Petal Flowers
- Start by kneading a piece of white gumpaste until pliable. Using the small non-stick rolling pin, roll the white gumpaste onto the grooved petal board. Cut 5 petals for each flower with the small peony cutter (you can use a similar shaped cutter or just a rose cutter), keeping the pieces under a piece of plastic wrap until you have all the petals cut. Then take a 26 gauge wire and dip it in water or glue, run your thumb and index finger while pinching to get rid of any excess water, dry your fingers, and then insert the wire halfway in the raised side of the petal. Carefully transfer to a foam pad and thin edges, press the balltool from the top of the petal hallway down to create a slightly concave shape, and put aside on a piece of foam to dry overnight.
- Centers: Take 15-20 stamens and wrap with white floral tape onto a 26 gauge wire. Mix a small amount of gold dust with lemon extract or vodka to make gold paint, dip the stamens into the gold paint, shake to remove excess and insert wire in a piece of Styrofoam to dry.
- Once petals have dried completely, take 5 petals for each flower and a piece of stretched-out floral tape to tape around the gold stamens.
Coloring Sugar Flowers with Petal Dusts
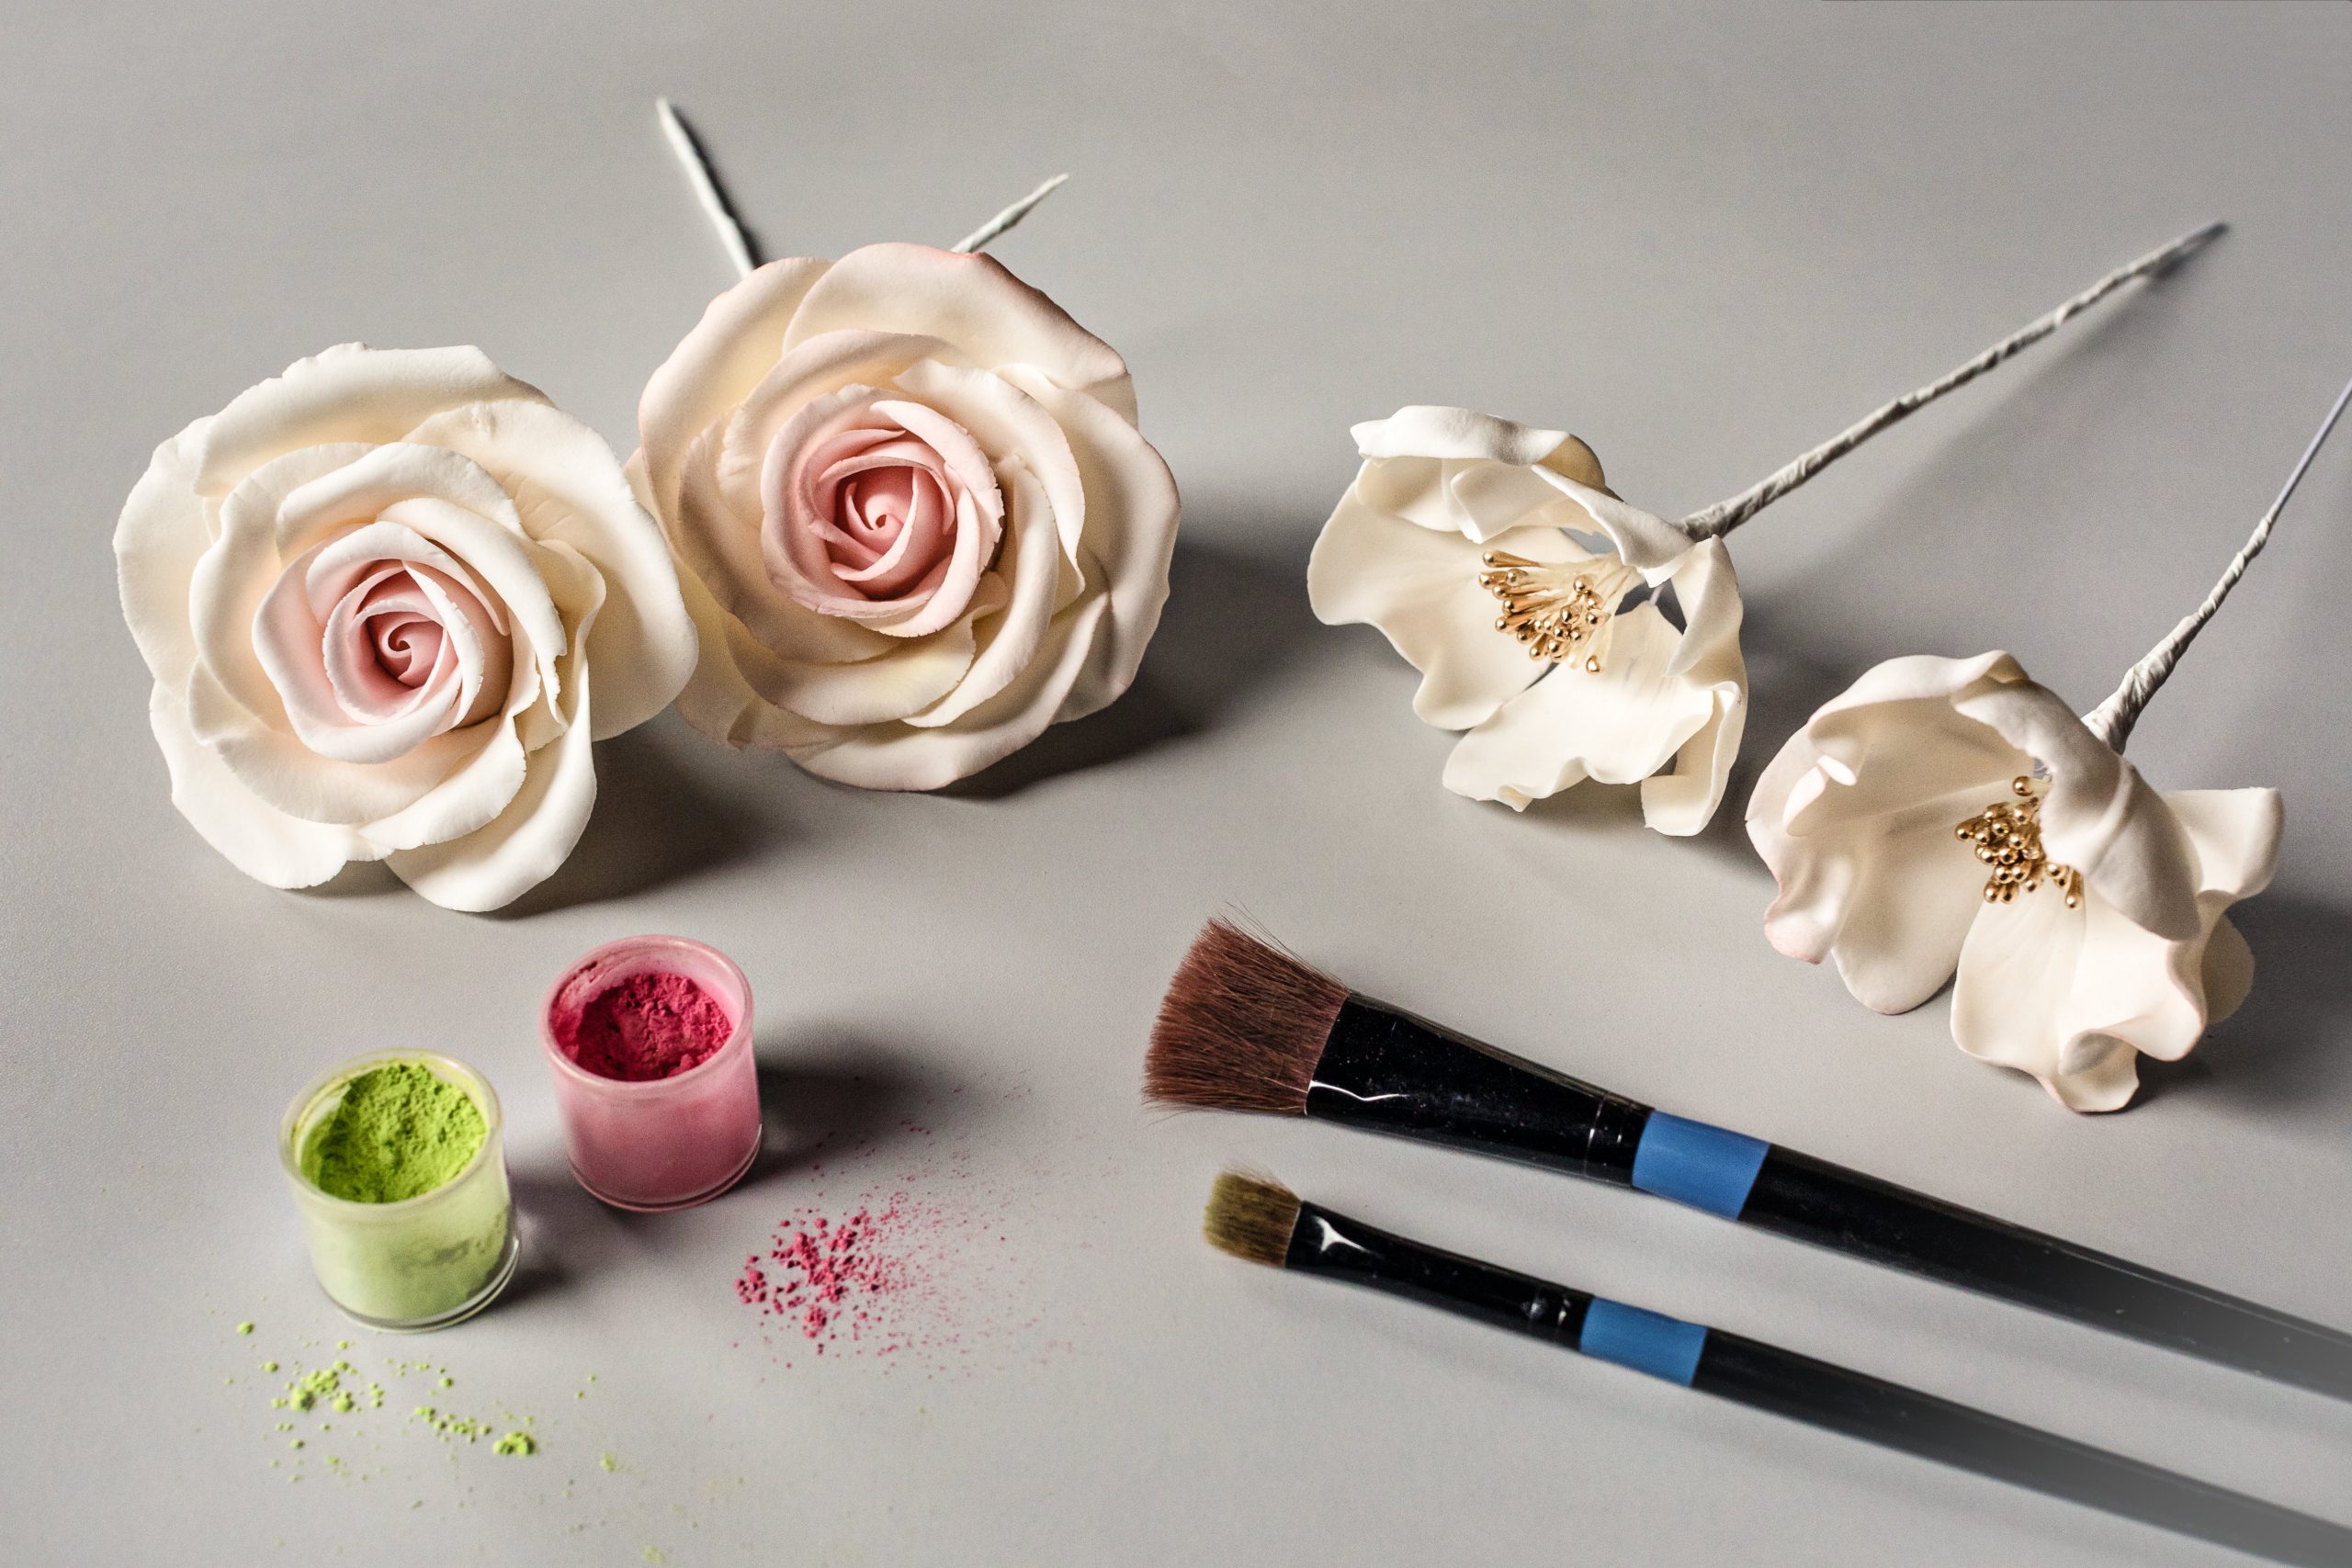
Place small amounts of both pink and green petal dusts on a piece of waxed paper, then, using a wide flat brush, charge a small amount of the pink dust and lightly brush the edges of the 5-petal flowers. Repeat with the roses, emphasizing the center. Now with a small flat brush, take a little of the green petal dust and brush lightly between petals as deep in between petals as your brush will go.
How to Make a Gumpaste Monogram Plaque
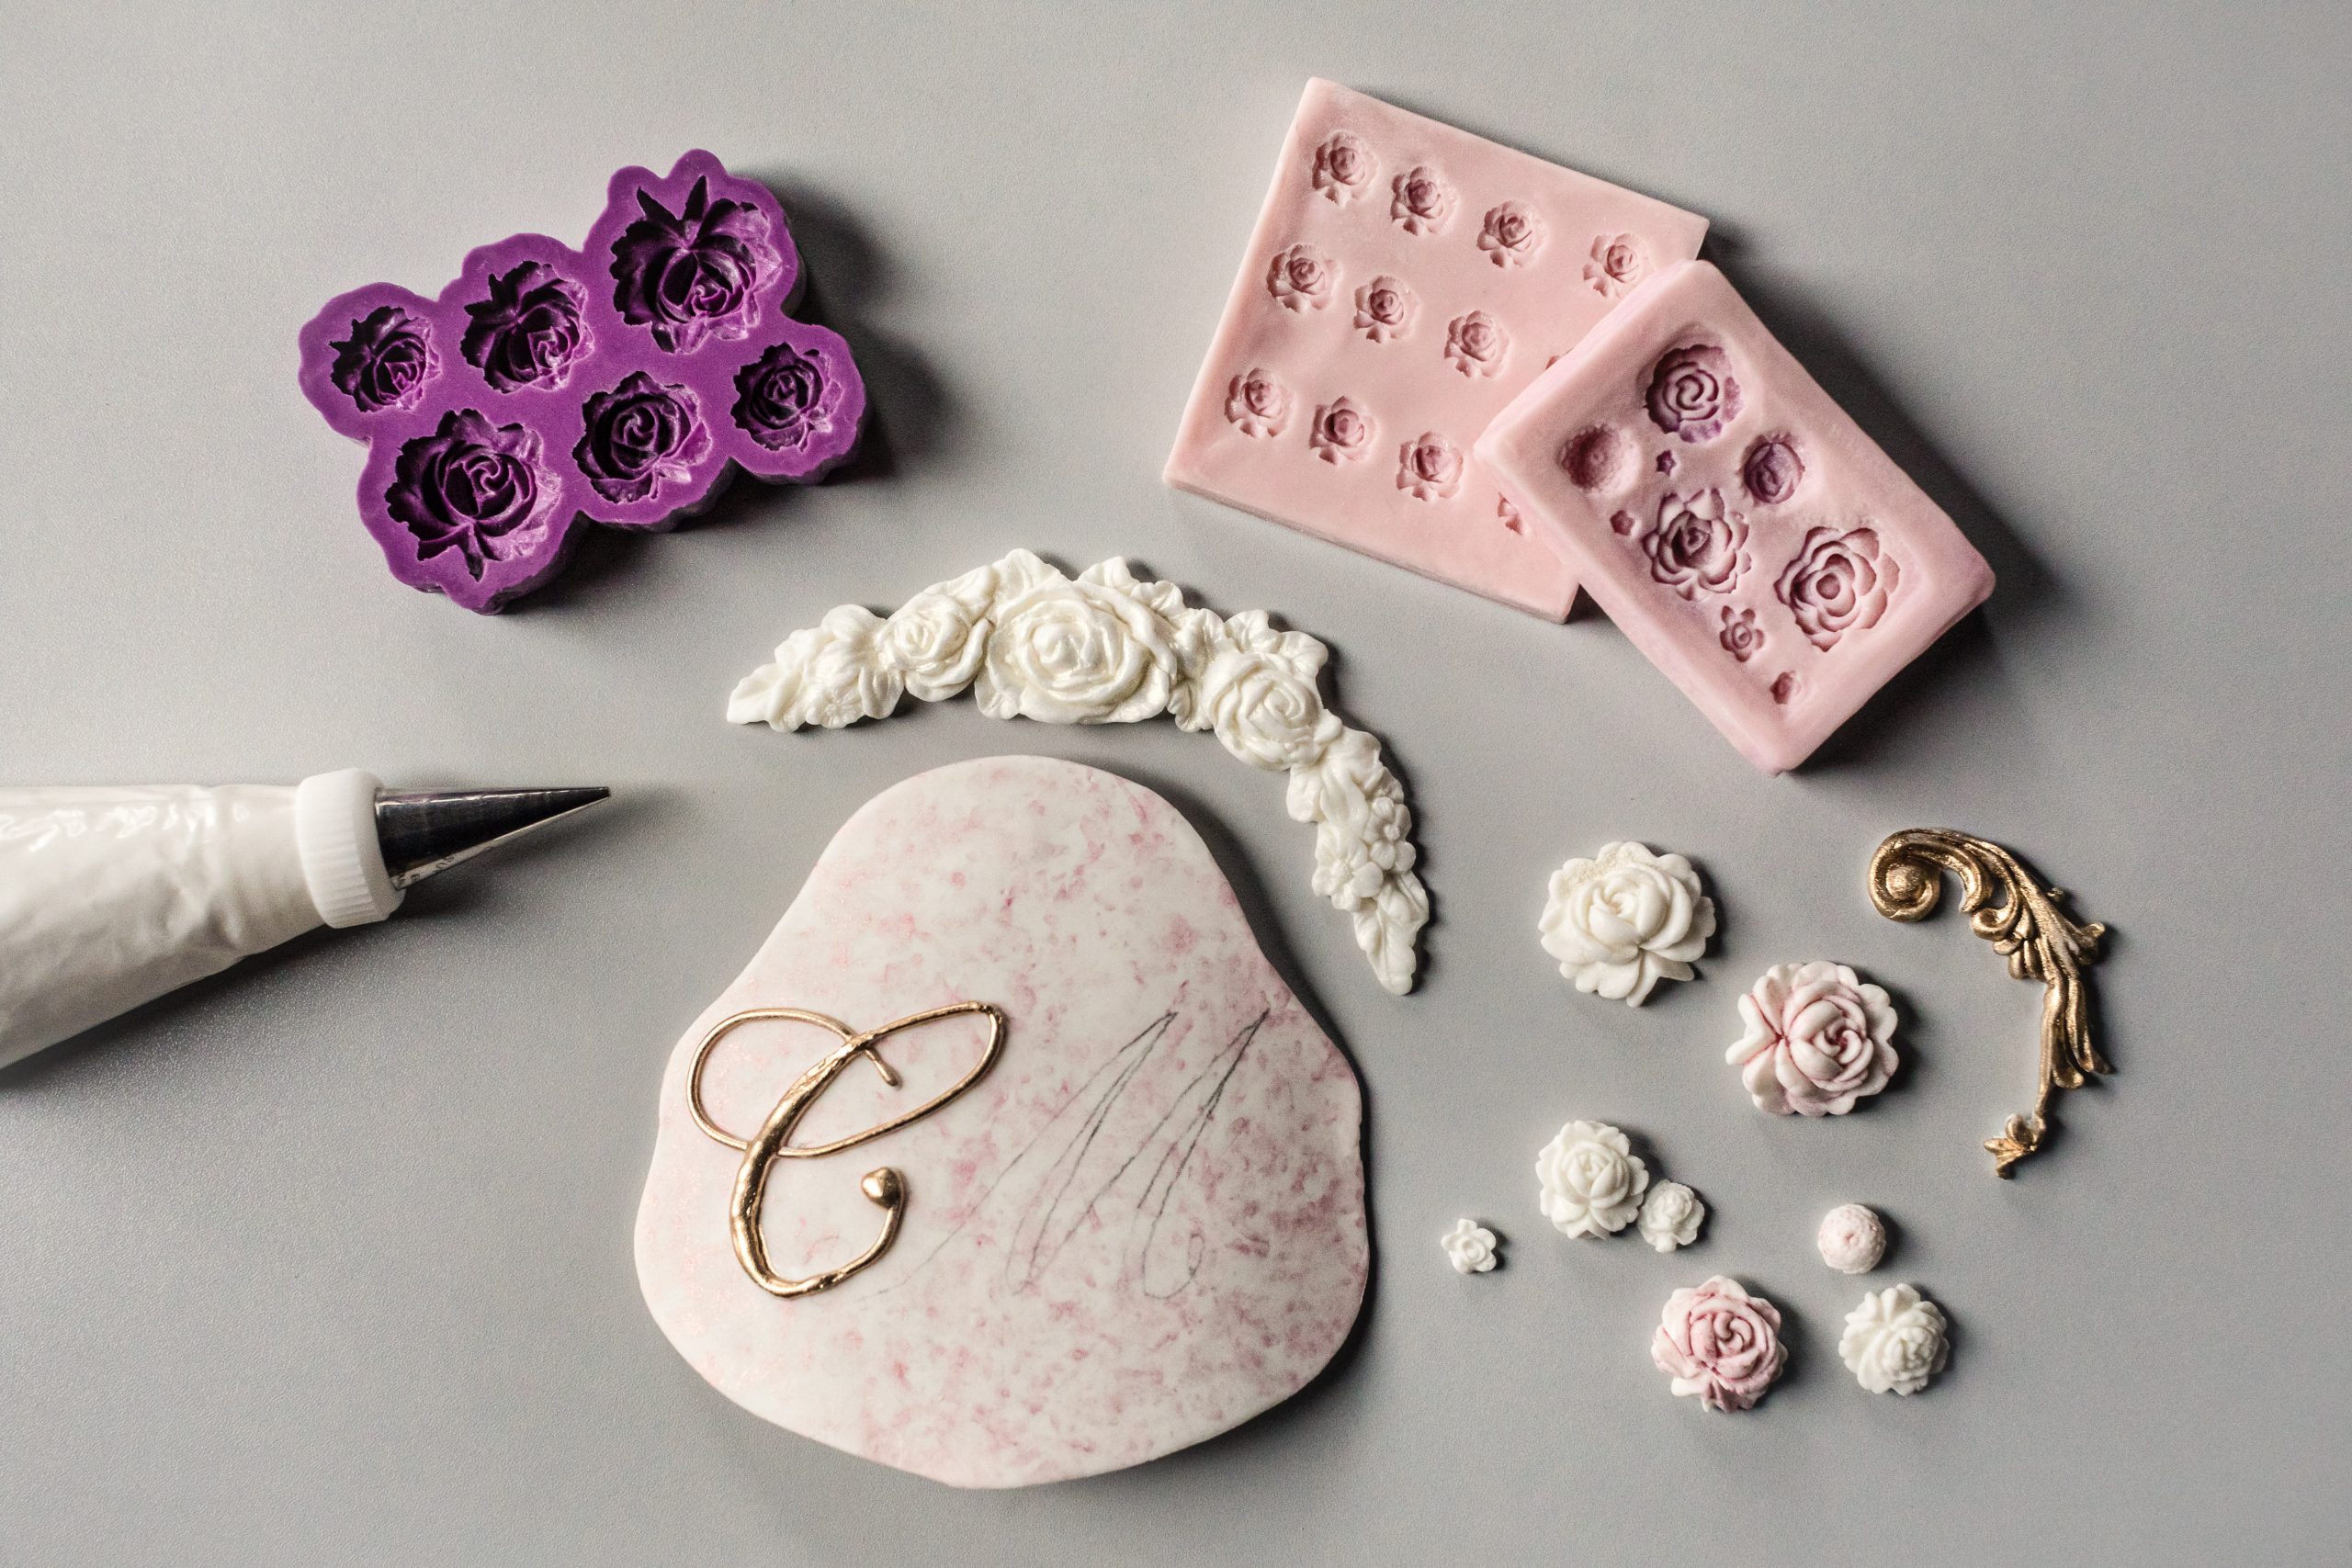
Roll out a thin piece of ivory colored gumpaste, cut any desired shape (oval or round) or similar to the one pictured here, about 4”~4 1/4” inches tall. Let dry overnight on top of a 7”inch round pan that has been placed on its side. To prevent the pan from rolling, you can place it inside a slightly smaller cake pan.
Alternatively you can use a round 7” d Styrofoam.
How to Sponge Paint on Gumpaste
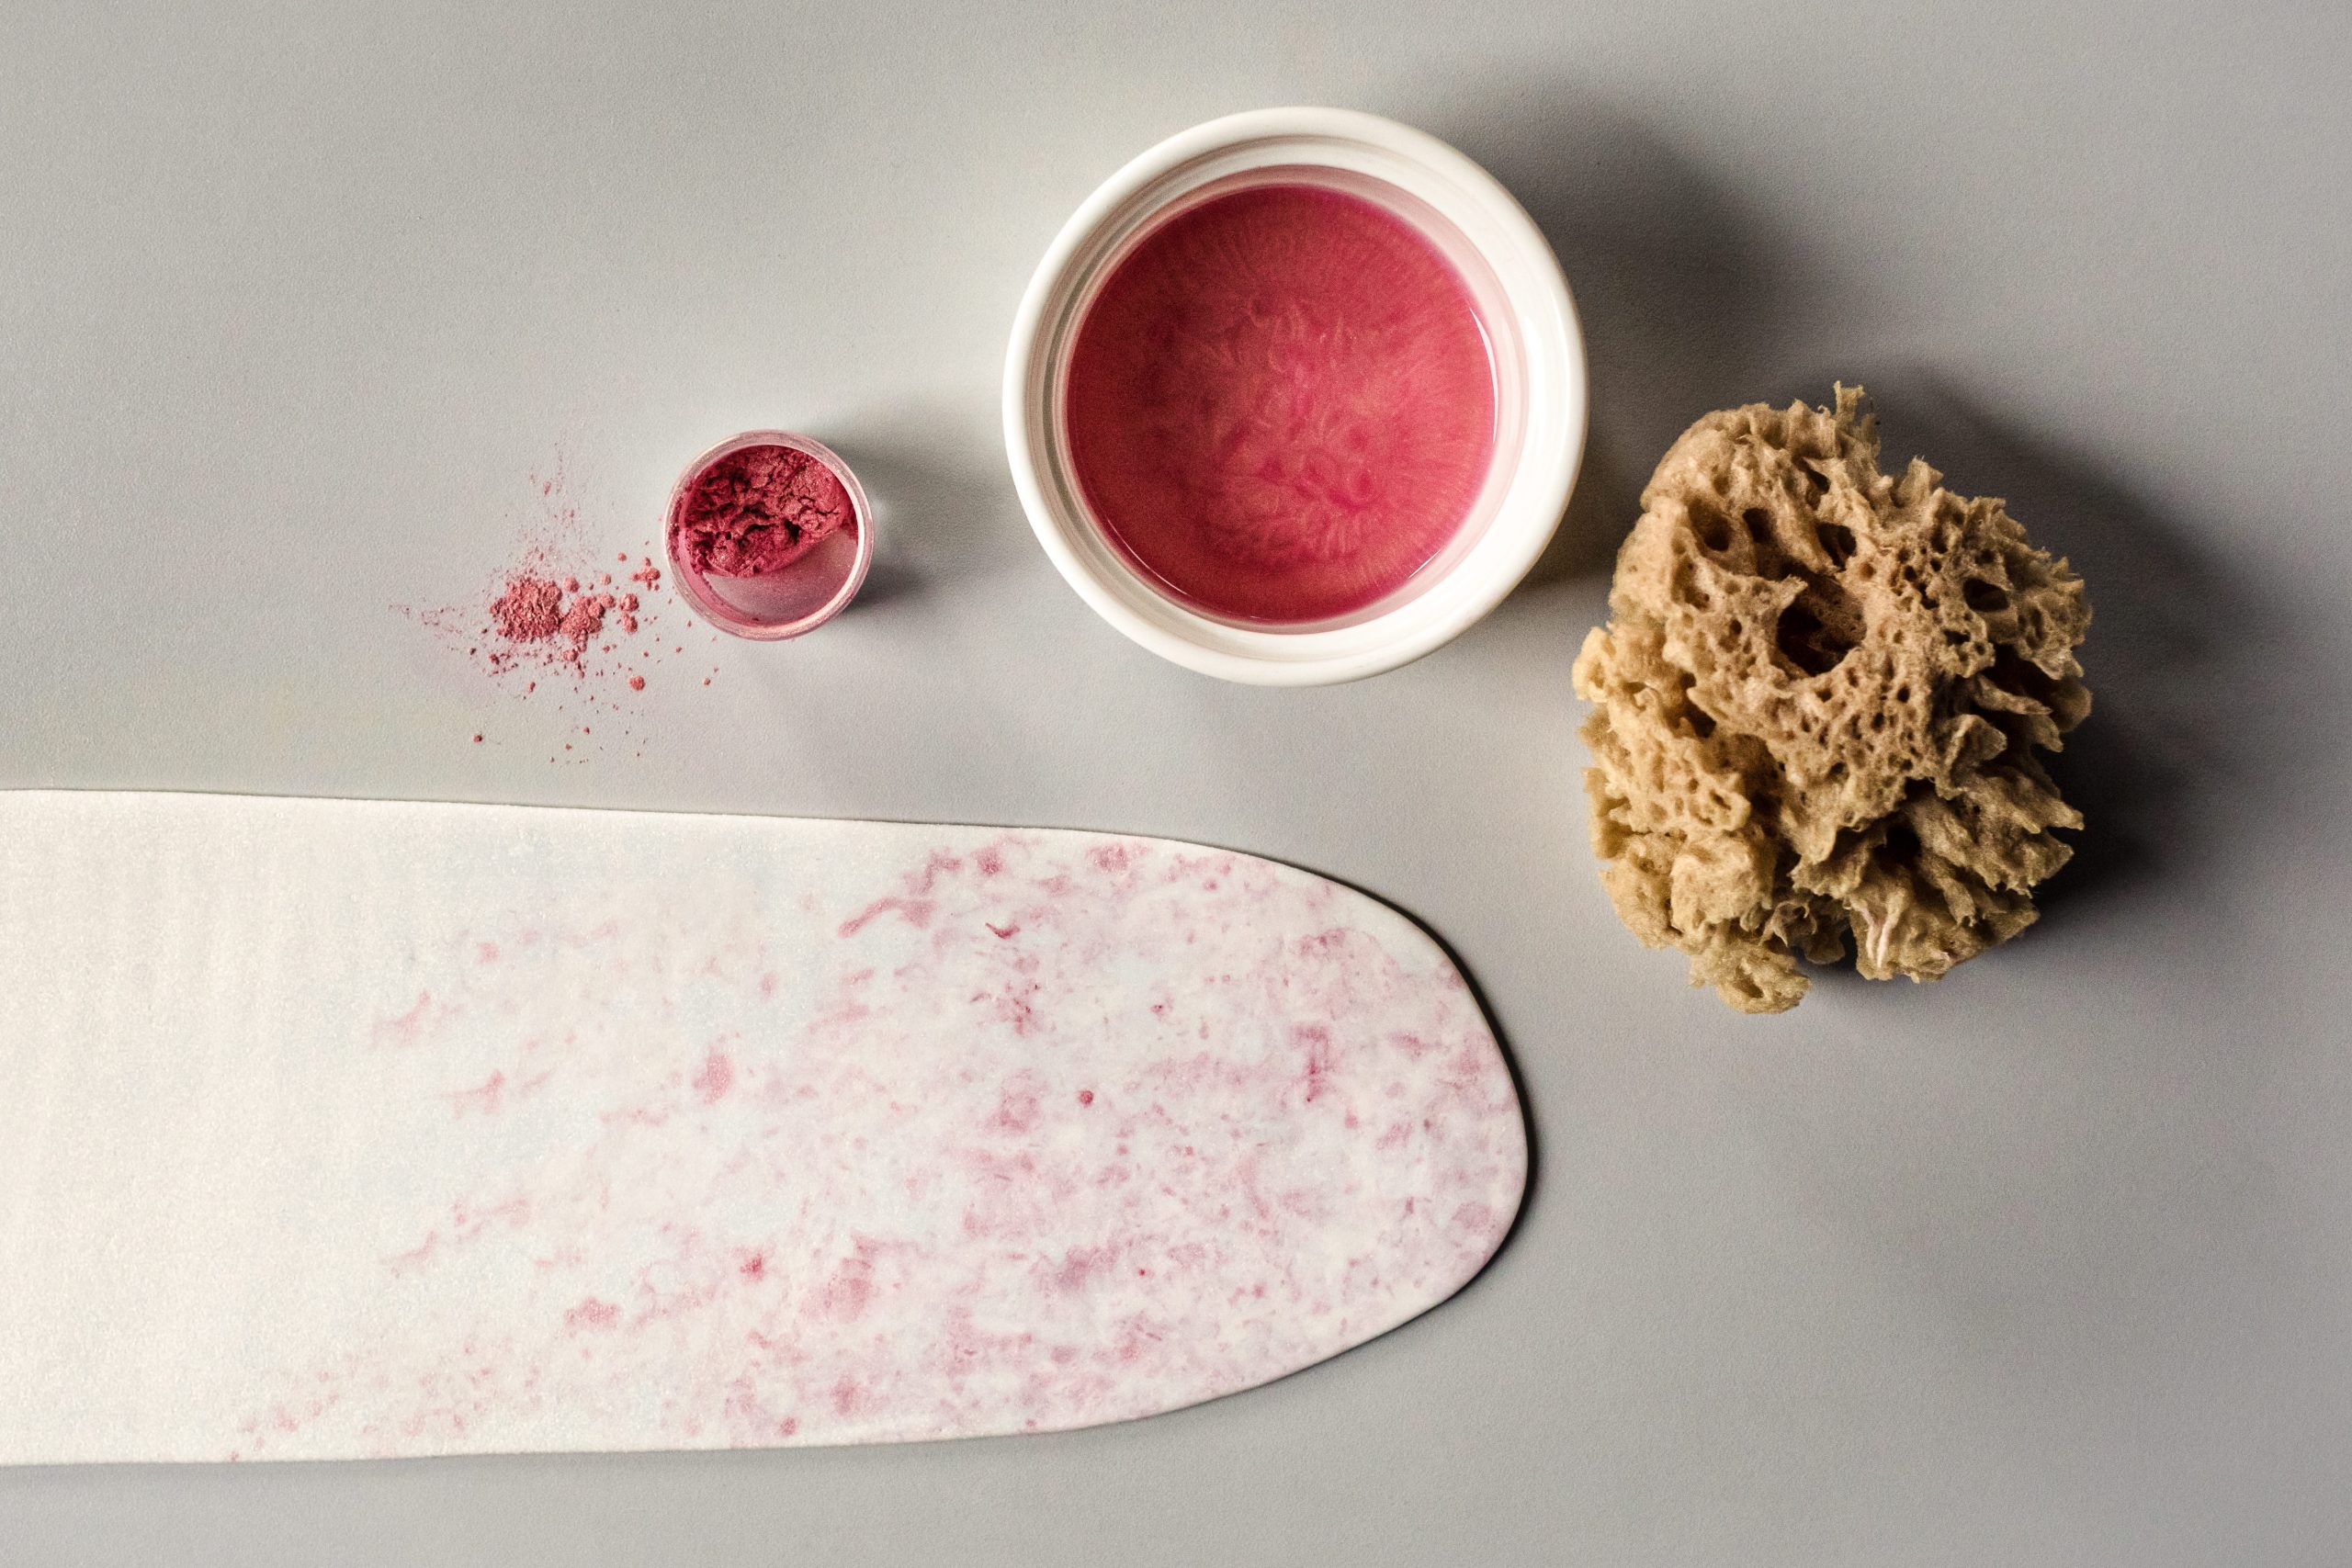
-Once the plaque has dried completely, dilute a small amount of iridescent pink powder with lemon extract or Vodka or any other clear alcohol, and using the natural sponge that has been dipped in the pink mixture and squeezed, start tapping the plaque to get an uneven look. Let dry for a few minutes.
-Using a pencil and the gumpaste plaque as a template, trace the edge on a piece of waxed paper. Trace one or two desired letters with a pencil; you can use a lettering stencil (if available) or you can resize any letters and print out from your computer, making sure the letters will fit inside the plaque. Shade the back of the paper template with a soft pencil, turn over, place on top of the plaque and transfer them to the plaque by tracing the letters.
-Fit a piping bag with a 1.5 round tip and fill 1/3 with royal icing. The royal icing should be of piping consistency; if it’s too dry add a few drops of water until smooth and soft.
-Pipe the monogram by tracing the transferred letters, and let dry.
How to Pipe a Royal Icing Monogram
-Using a pencil and the gumpaste plaque as a template, trace the edge on a piece of waxed paper. Trace one or two desired letters with a pencil; you can use a lettering stencil (if available) or you can resize any letters and print out from your computer, making sure the letters will fit inside the plaque. Shade the back of the paper template with a soft pencil, turn over, place on top of the plaque and transfer them to the plaque by tracing the letters.
-Fit a piping bag with a 1.5 round tip and fill 1/3 with royal icing. The royal icing should be of piping consistency; if it’s too dry add a few drops of water until smooth and soft.
-Pipe the monogram by tracing the transferred letters, and let dry.
How to Make Fondant & Gumpaste Molded Decorations
-Using a 50% gumpaste 50% fondant mixture, start making the molded decorations. Brush molds with a small amount of corn starch and then fill with small pieces of the 50/50 mixture.
-Make 1 flower garland, 2 scrolls (or similar), and about 15~20 roses and other mini flowers in assorted sizes. You can also just use roses in lieu of the garland and scrolls.
Finishing the Gumpaste Monogram Plaque
-After you’ve finished making all the scrolls, garlands and mini flowers. Try overlapping and gluing them with a dot of royal icing.
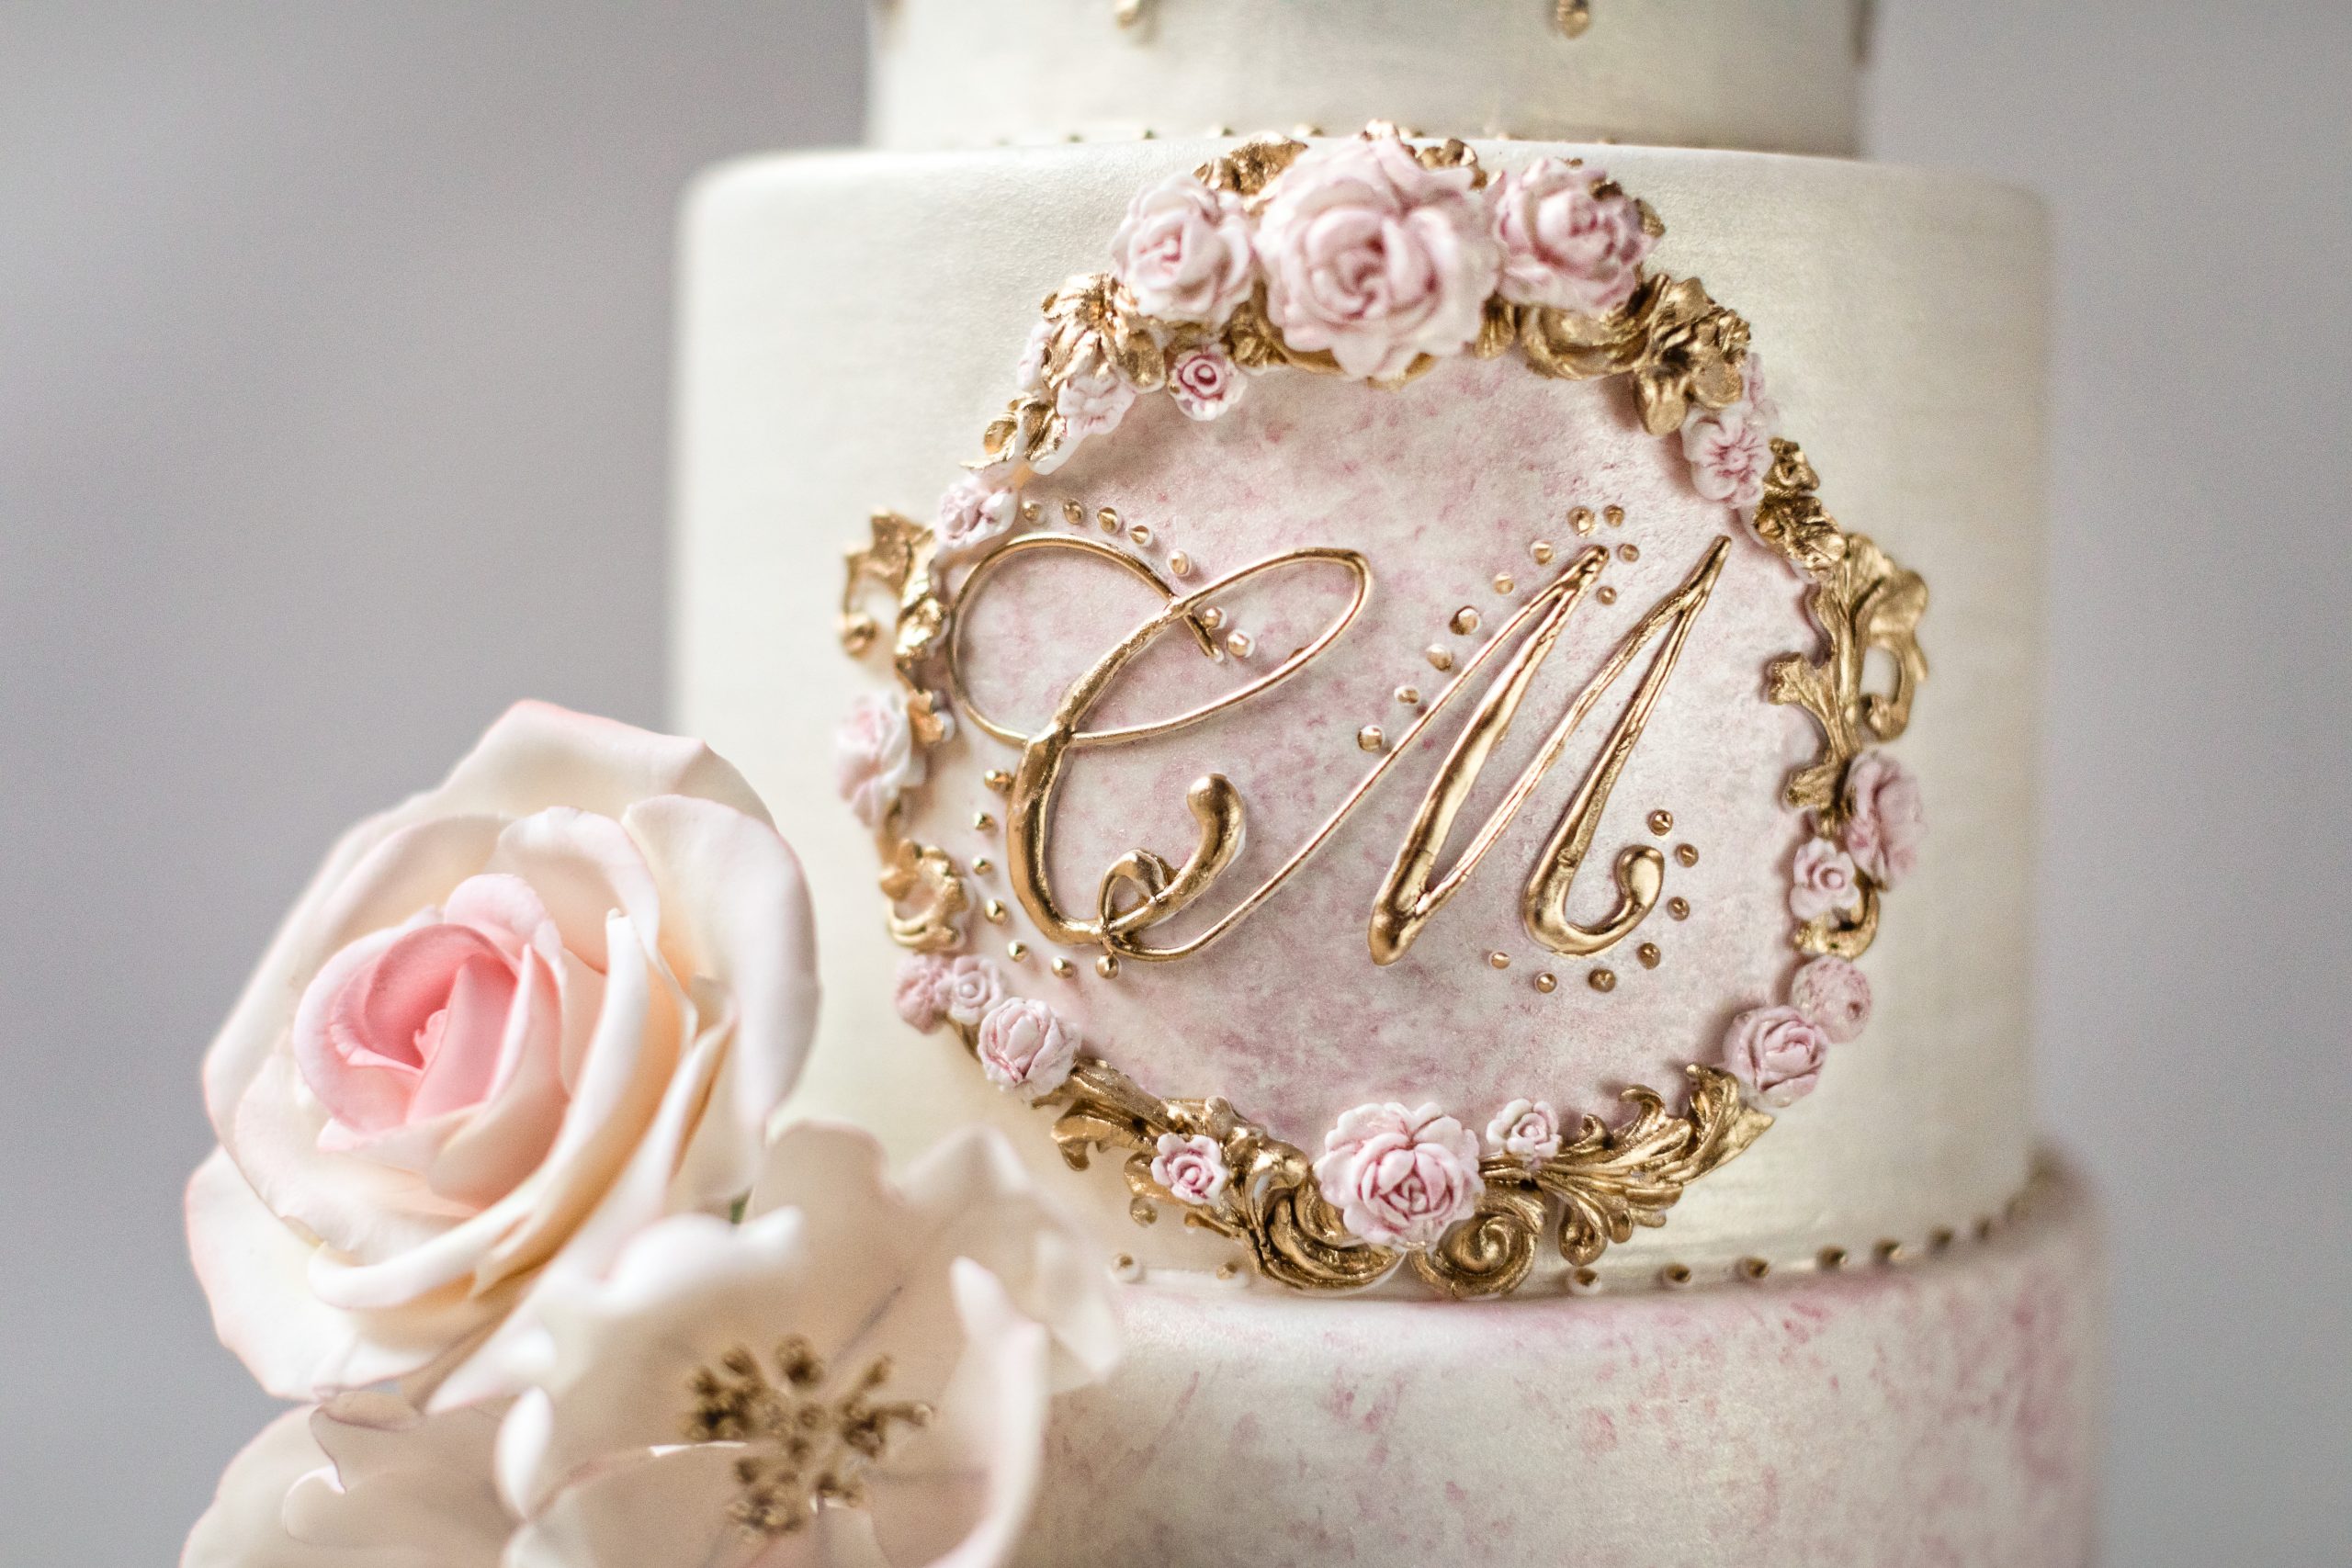
-Once you have glued all the flowers around the gumpaste plaque, make 2 edible paints with the lemon extract or Vodka and the gold dust and pink luster dust. Be creative; in this example I painted most of the molded pieces around the plaque and the letters with the gold paint but left a few of the roses and flowers unpainted and highlighted the centers with the pink paint.
Decorating the Wedding Cake Tiers
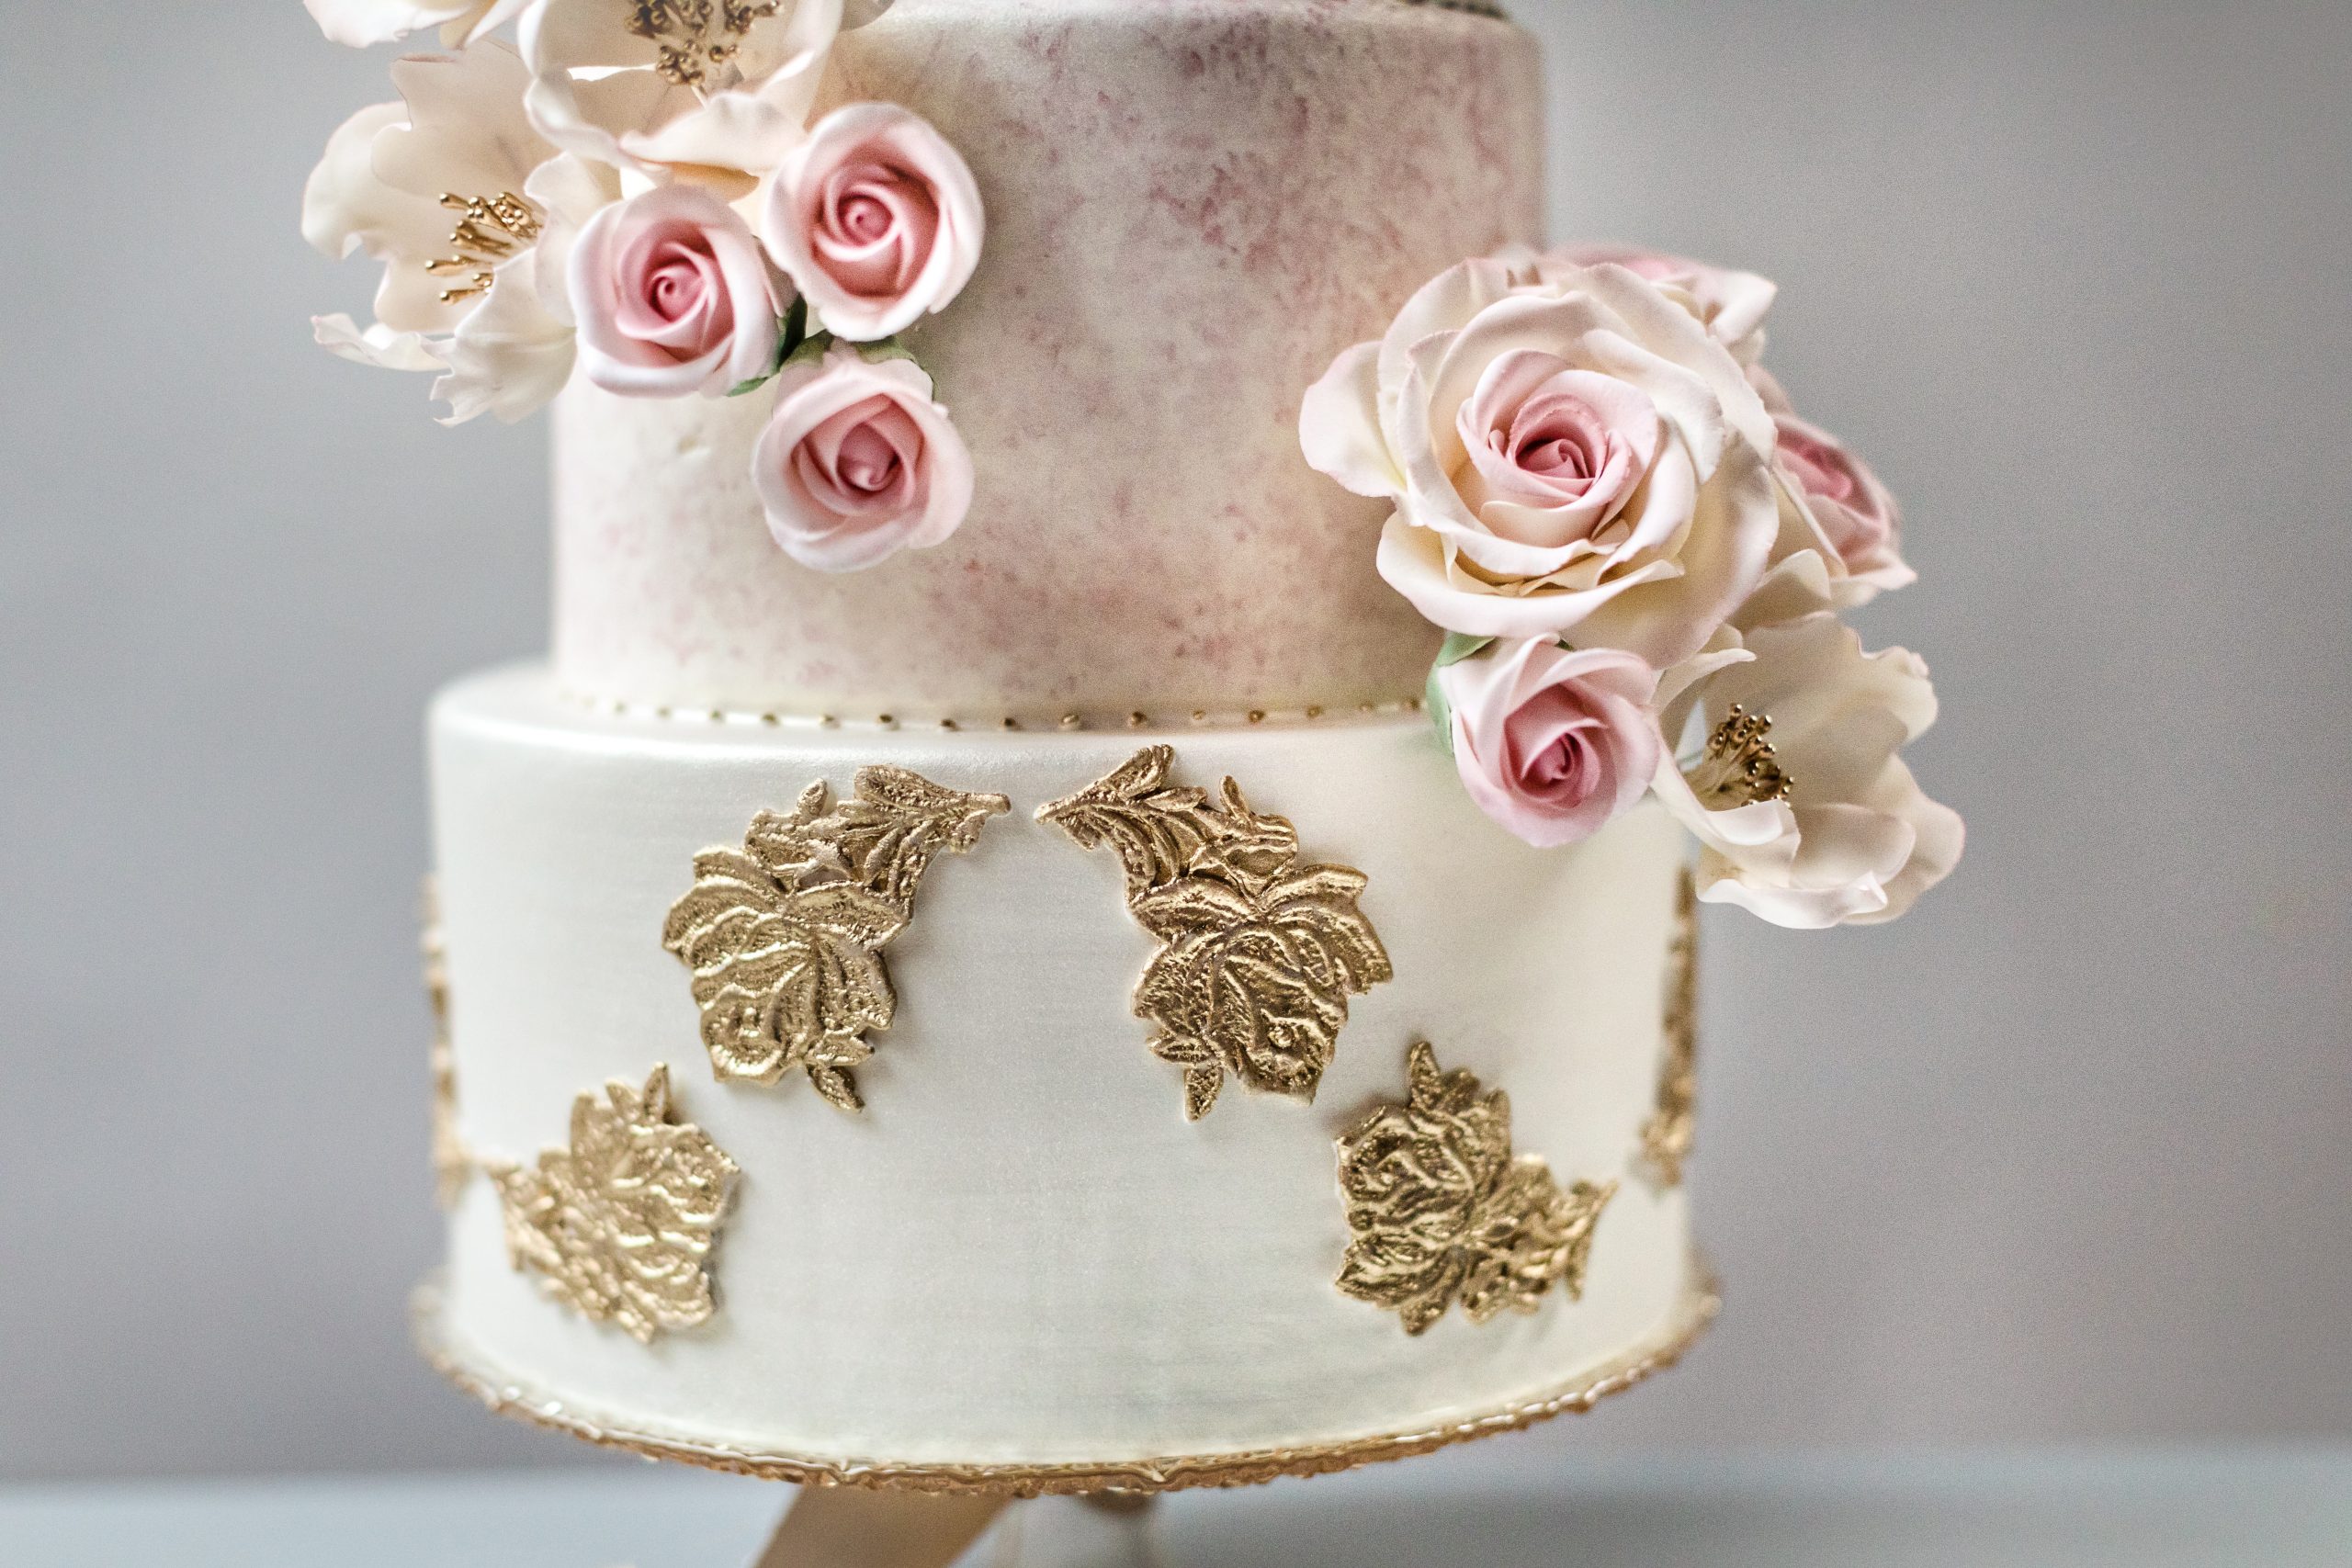
-Cover the cake tiers with the ivory fondant/sugar paste, and using a round wide brush, dust all the cake tiers with the gold pearl dust for a satin finish.
-Insert the wooden dowels for support. To ensure all dowels in one tier are of the same length, insert one dowel in the cake, use a pencil to mark the top edge while making sure it aligns with the cake surface, pull out, align marked dowel and 3 others lengthwise, mark 3 others with a pencil at same length as marked dowel, cut all 4 dowels at the marks, and insert into cake. Dowels should be close enough to center to support the tier directly above, and far enough apart to give good support. Place tiers back in refrigerator until ready to stack and decorate.
-Paint the 8” tier with the same sponge technique used for the monogram plaque. (Image #6)
-Spread a thin layer of royal icing on top of bottom tier and start stacking the cakes; repeat until all tiers are stacked. Place the cake back in refrigerator while you finish the rest of the decorations.
How to Make Fondant Lace Decorations
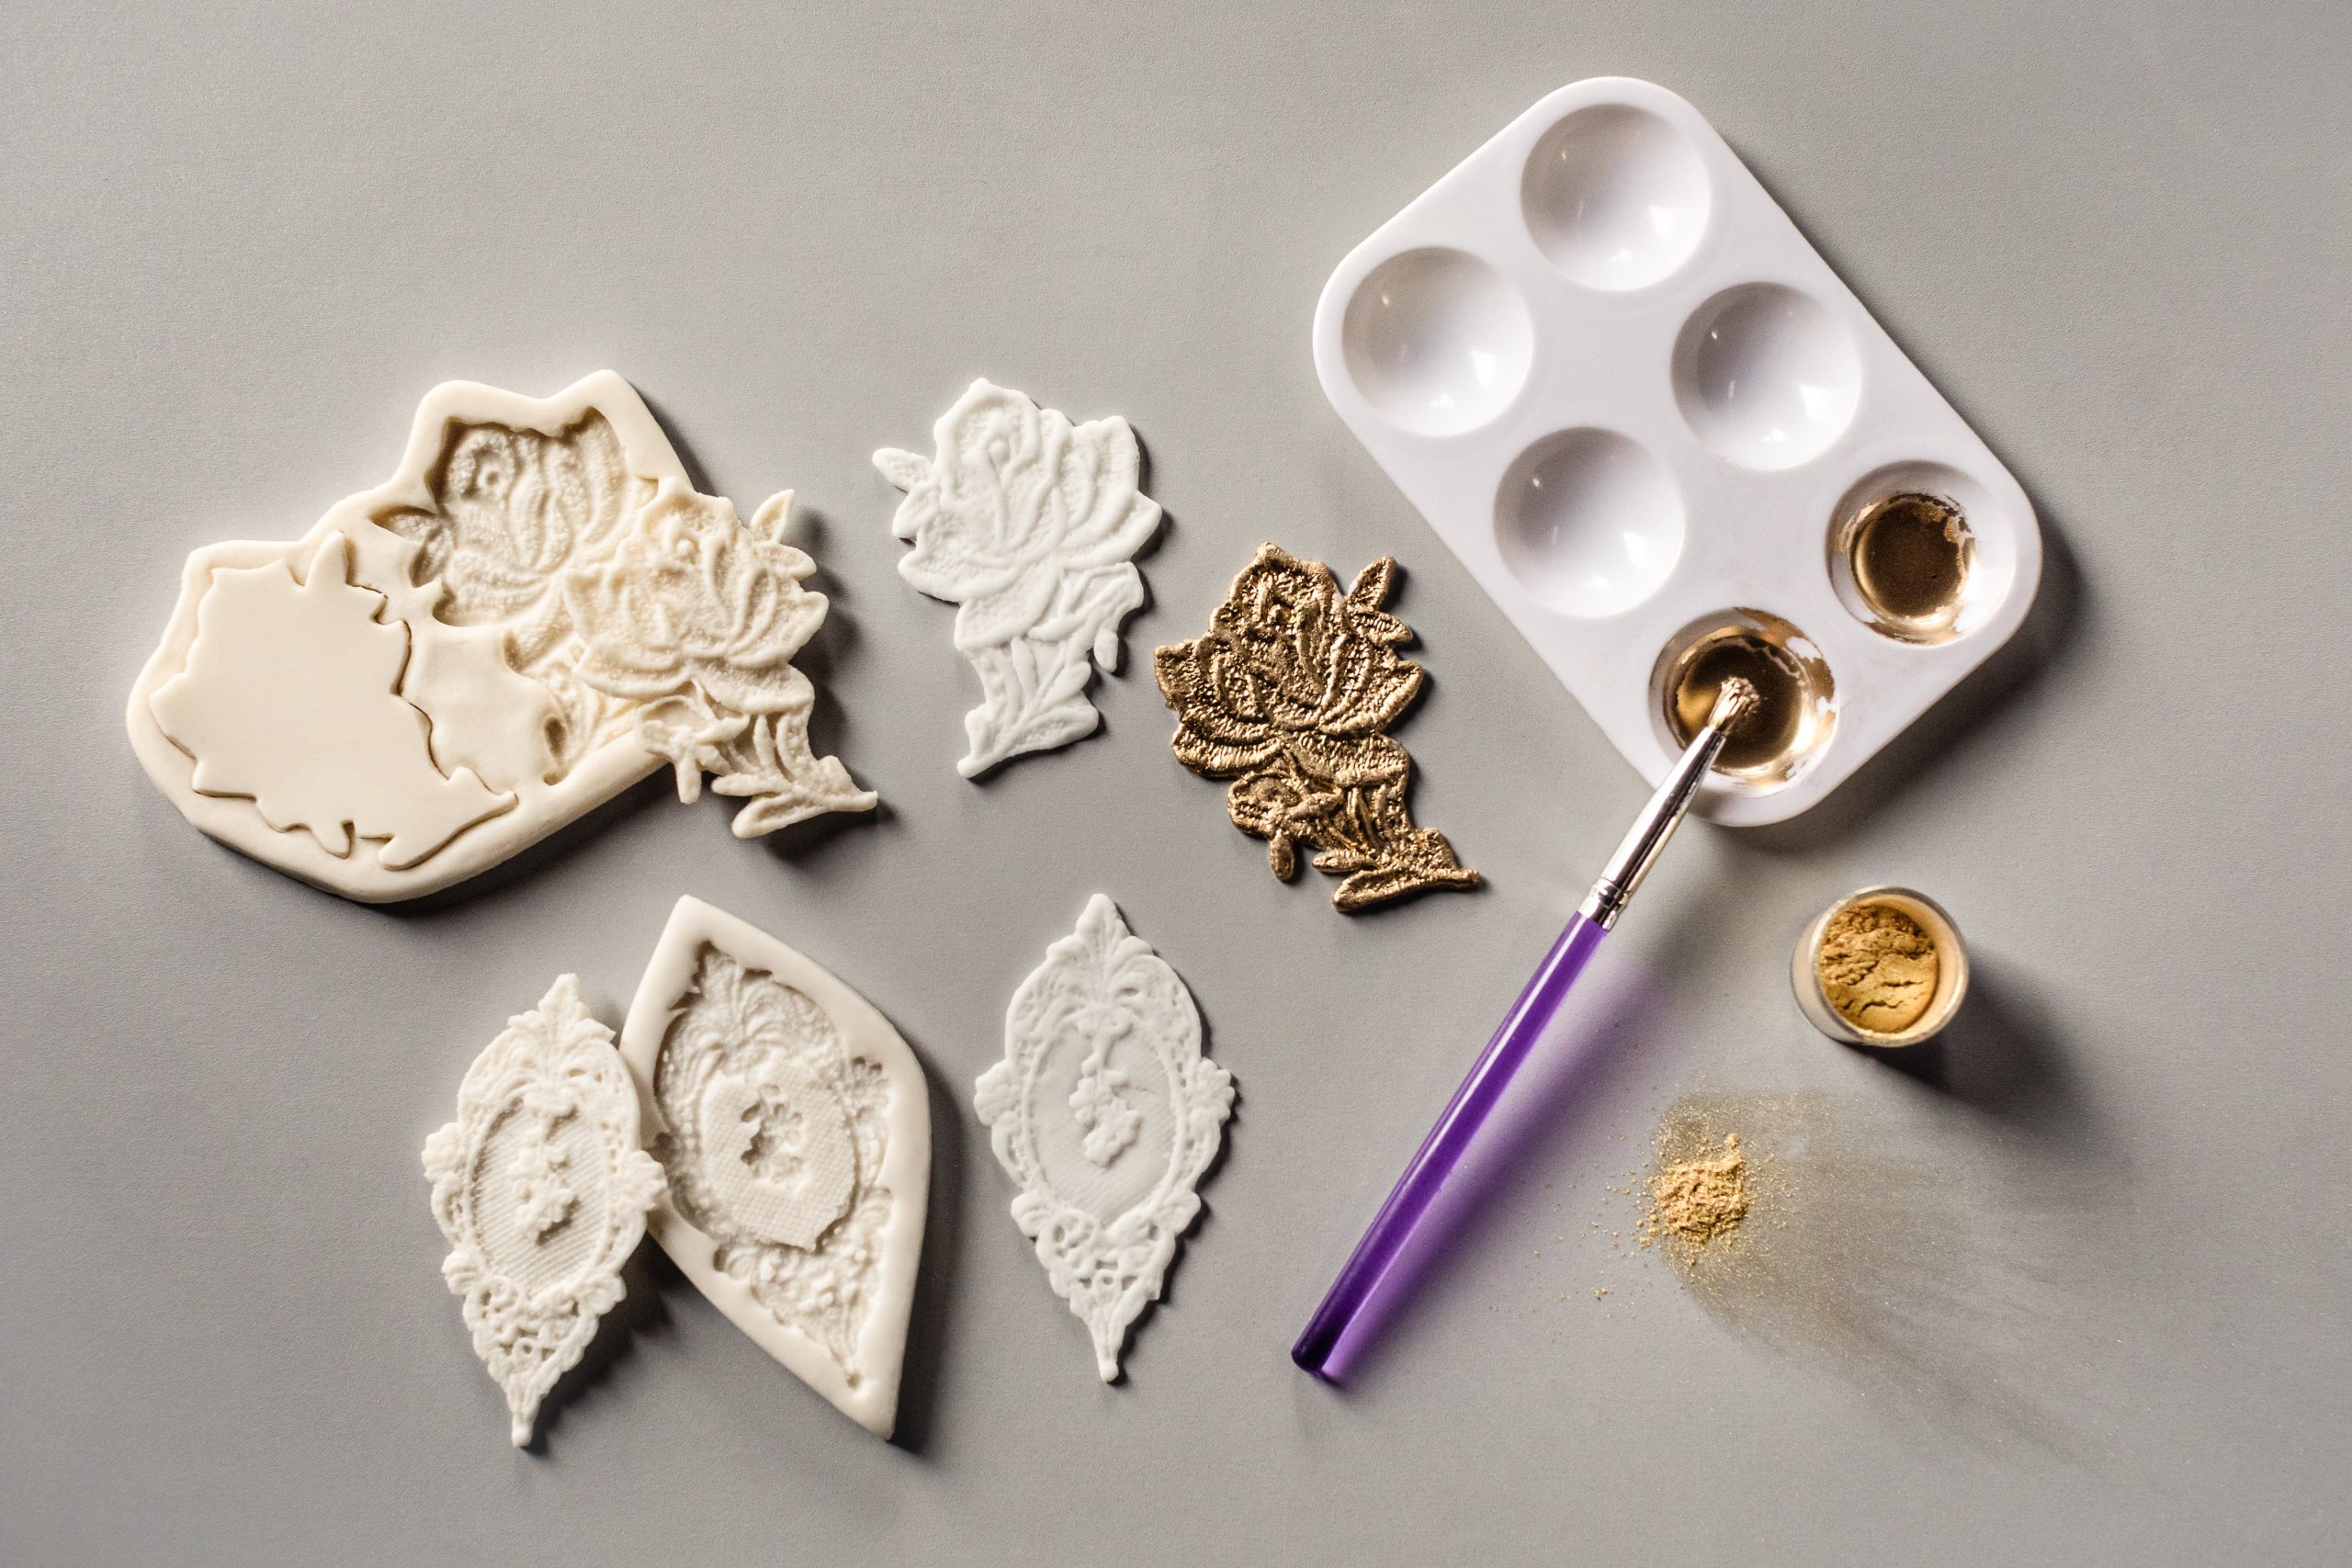
-Start by rolling out a thin piece of fondant, cut it with a pizza wheel to fit loosely on top of the lace and rose double sided molds that have been brushed lightly with corn starch. Place the top of the mold and press with a heavy rolling pin. Then, while pressing the top mold with your hand, carefully rip any fondant pieces sticking outside the mold. Take away the top of the mold, and using your fingertips, push any leftover fondant to fit within the mold, put the top mold piece back in place, and press again with the rolling pin. Take the piece out and keep covered with plastic wrap to prevent the molded fondant from drying too fast.
-For this wedding cake you will need 8 lace pieces and 12 rose pieces. Once all the pieces are done, mix the gold dust with the lemon extract to make a paint. Use a brush to paint all the lace and rose molded pieces.
Wedding Cake Final Steps
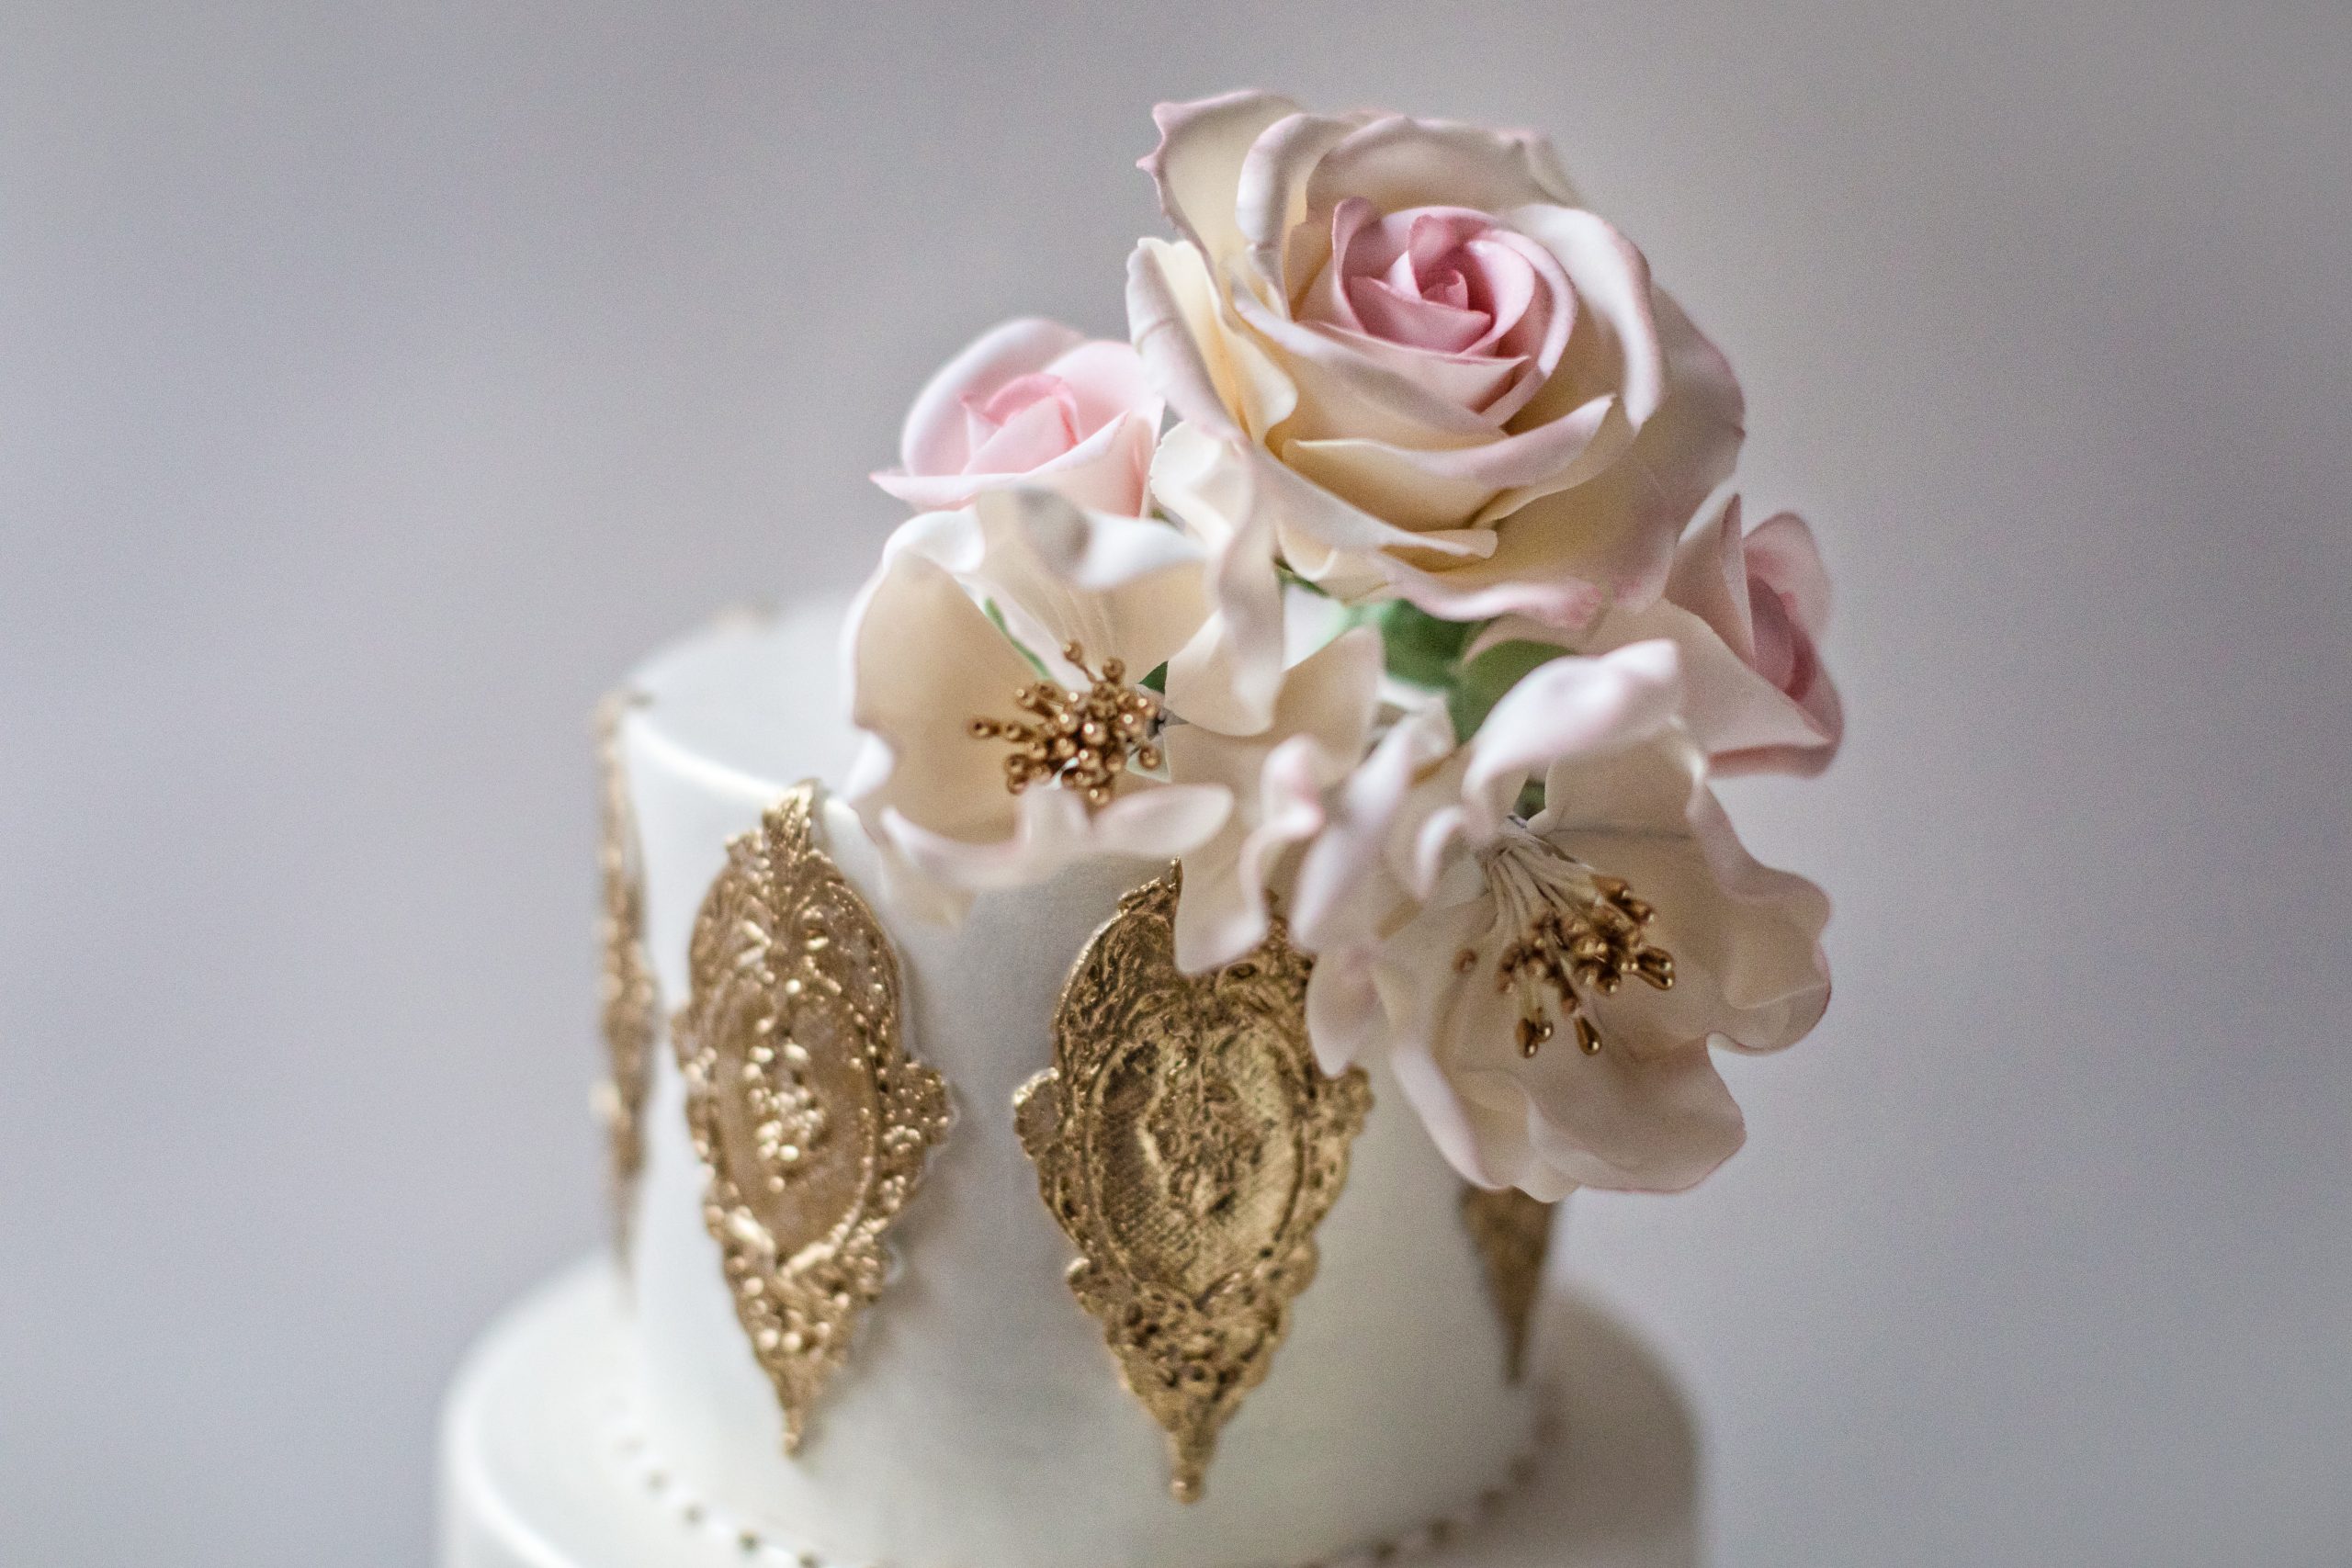
-Take the stacked cake out of the refrigerator. Brush the back of each molded lace or rose piece with a little water, then glue in place.
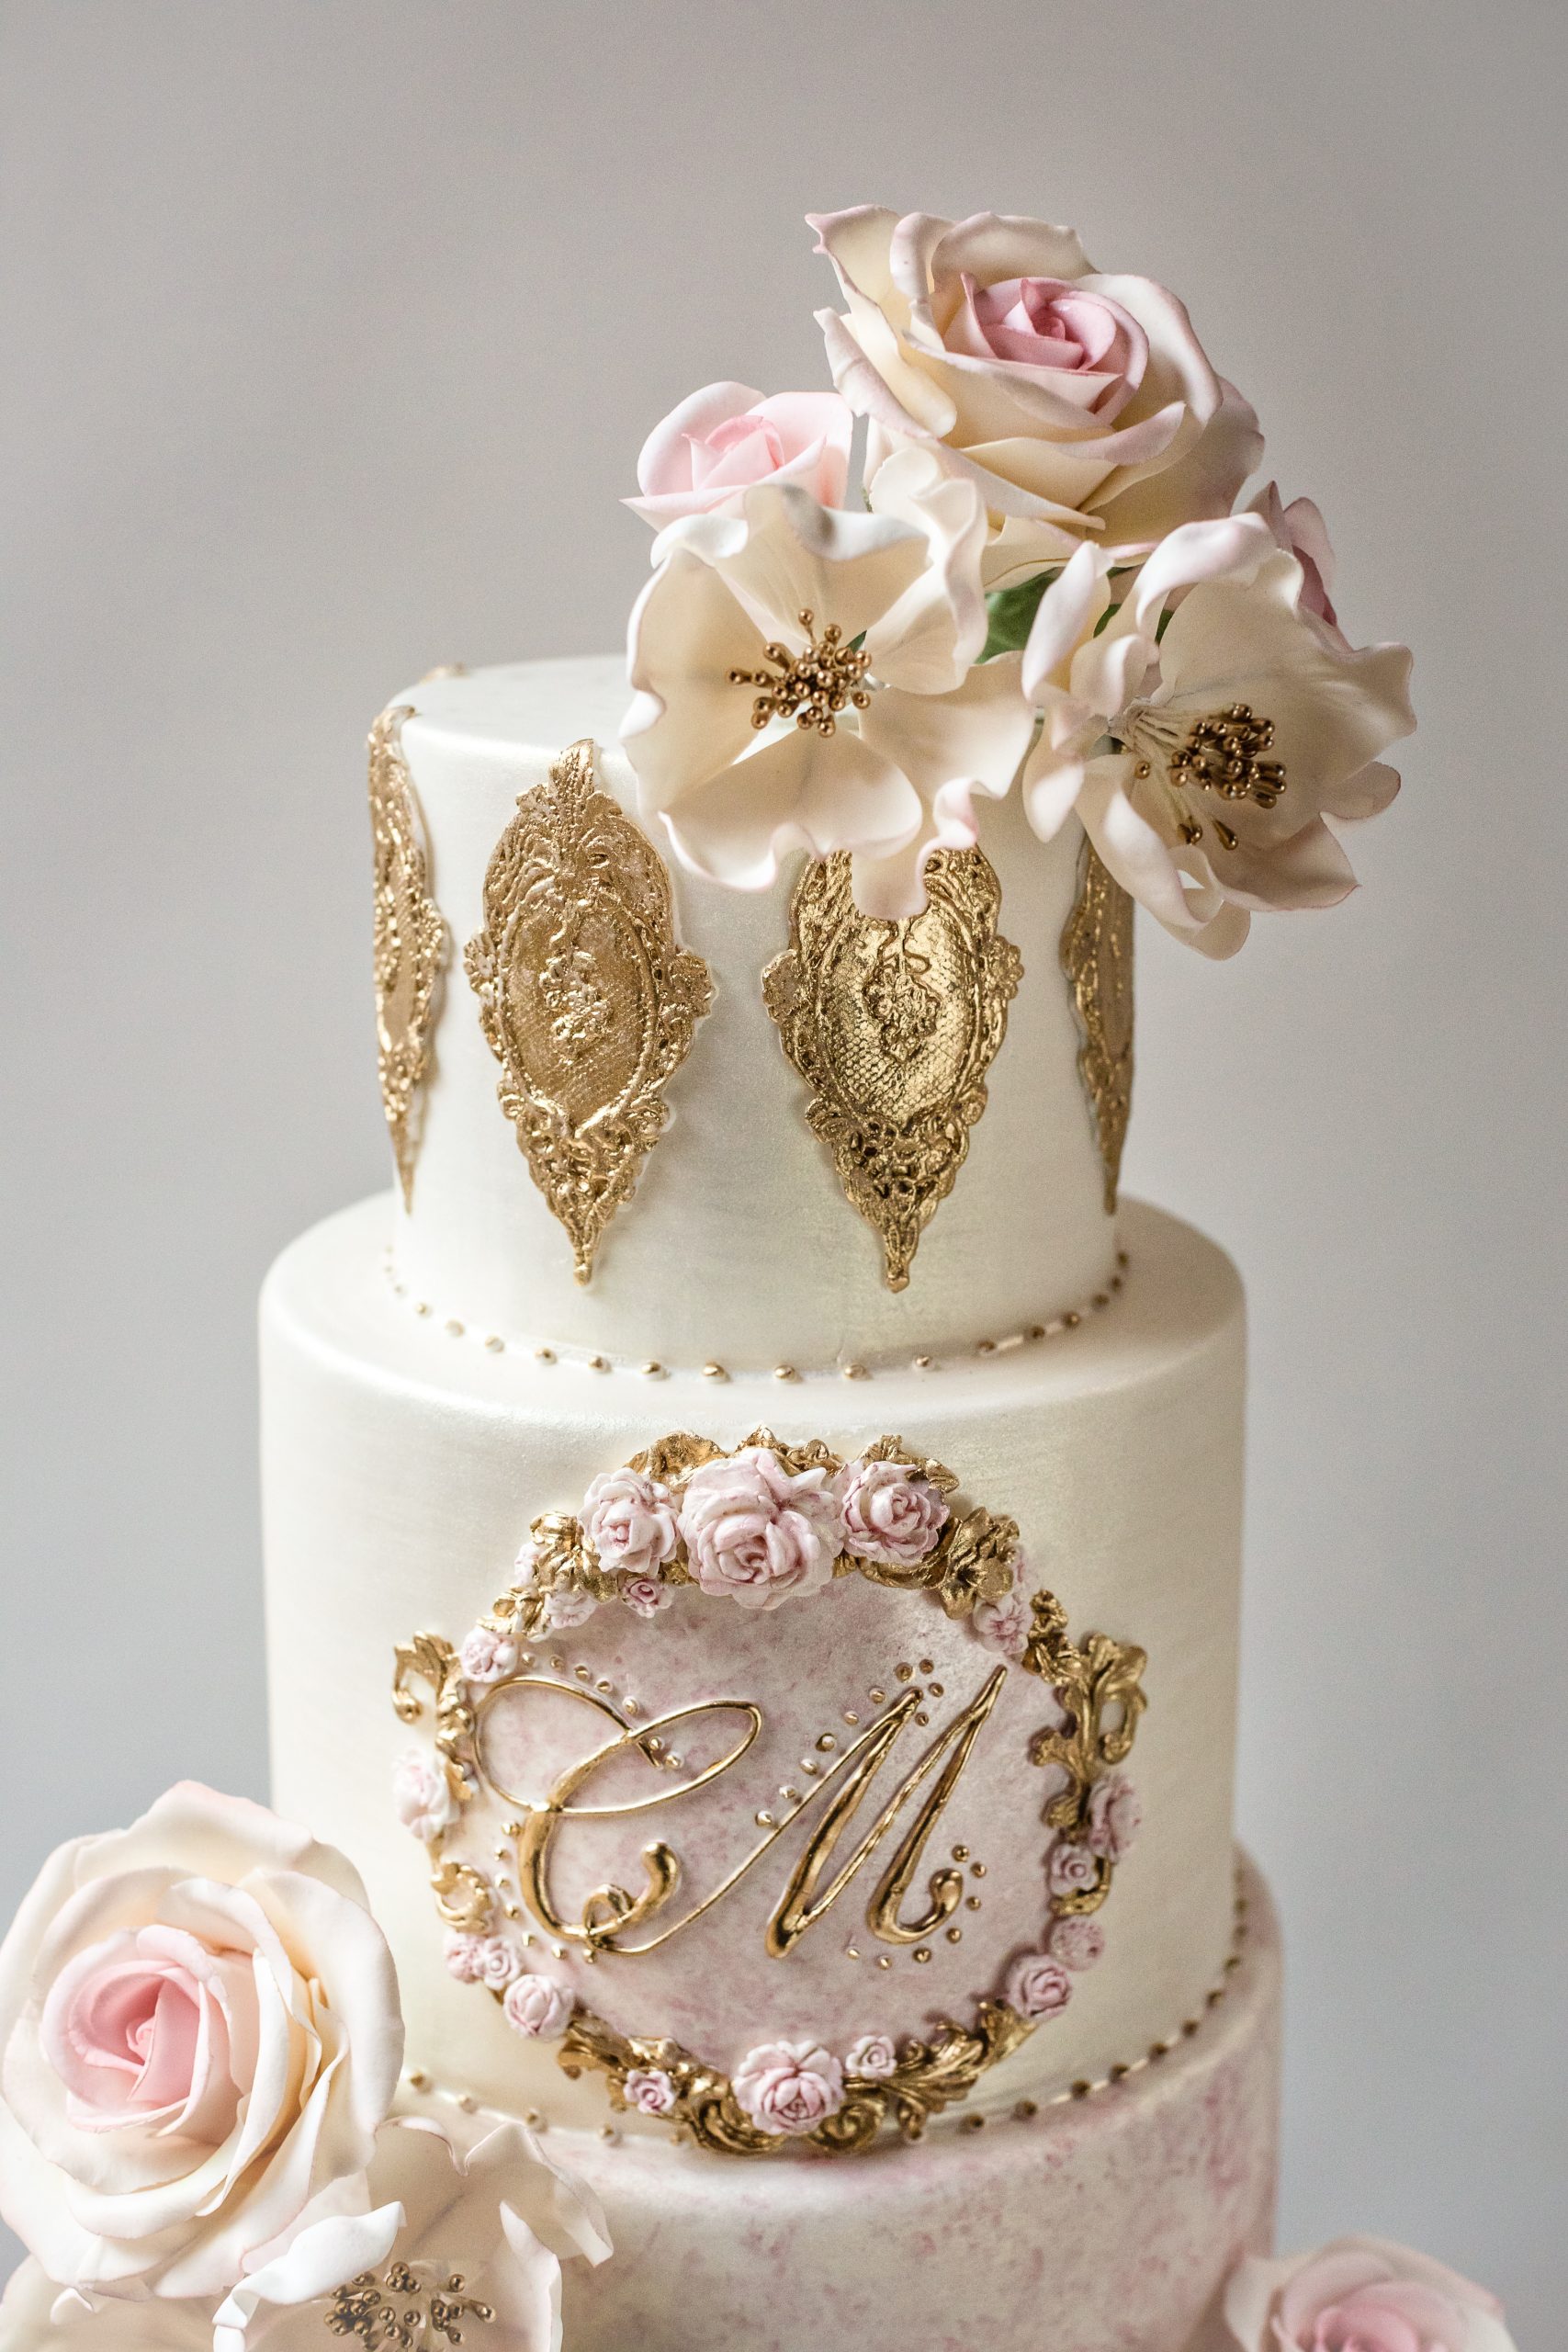
-Glue the monogram plaque with dots of royal icing.
-Take a piece of Ivory fondant and glue it with a little water to the places where you’ll be inserting the sugar flowers; this will act as your support.
Insert all the flowers as shown.
Royal Icing Recipe:
Mix 1 lb. confectioner’s sugar, 3 tablespoons meringue powder and 6-7 tablespoons warm water. Mix on high for 1 minute, scrape down sides and beat additional 5~6 minutes or until stiff peaks form. Keep covered with plastic wrap and damp cloth in refrigerator until ready to use.

This project by Ana Parzych was featured in Cake Masters Magazine
I hope you enjoyed crafting this vintage-inspired wedding cake!
Stay updated with our latest tutorials, videos, and upcoming workshops by subscribing to our Newsletter.